Featured
How To Clear Clogged Sink With Dish Soap: 6 Tips
No matter how hard we try to avoid it, we all experience clogged sinks from time to time. Clogged sinks can be caused by a variety of reasons, including hair buildup, soap scum, and food waste.
Did you know that when you pour dish soap down the drain it can actually help clear a clogged sink? It’s true! In this blog post, we’re going to take a look at some easy tips for clearing a clogged sink with dish soap. Keep reading to learn more!
1. Boil a pot of water and pour it down the drain.
If you have a clogged sink, the first step is to boil some water and pour it down the drain. This will help loosen up any build-up in the sink and make it easier to clean. Next, use dish soap to scrub the area where the clog is located. Be sure to use plenty of soap and hot water; otherwise, you could end up damaging your pipes. Finally, pour a pot of cold water down the drain to clear out any leftover soap solution.
If your sink is clogged, the first thing you should do is try boiling a pot of water and pouring it down the drain. This will help to loosen any clogs. If that doesn’t work, you can use a plunger to clear the obstruction. Finally, if all else fails, you can call a plumber – Rørlegger Ski.
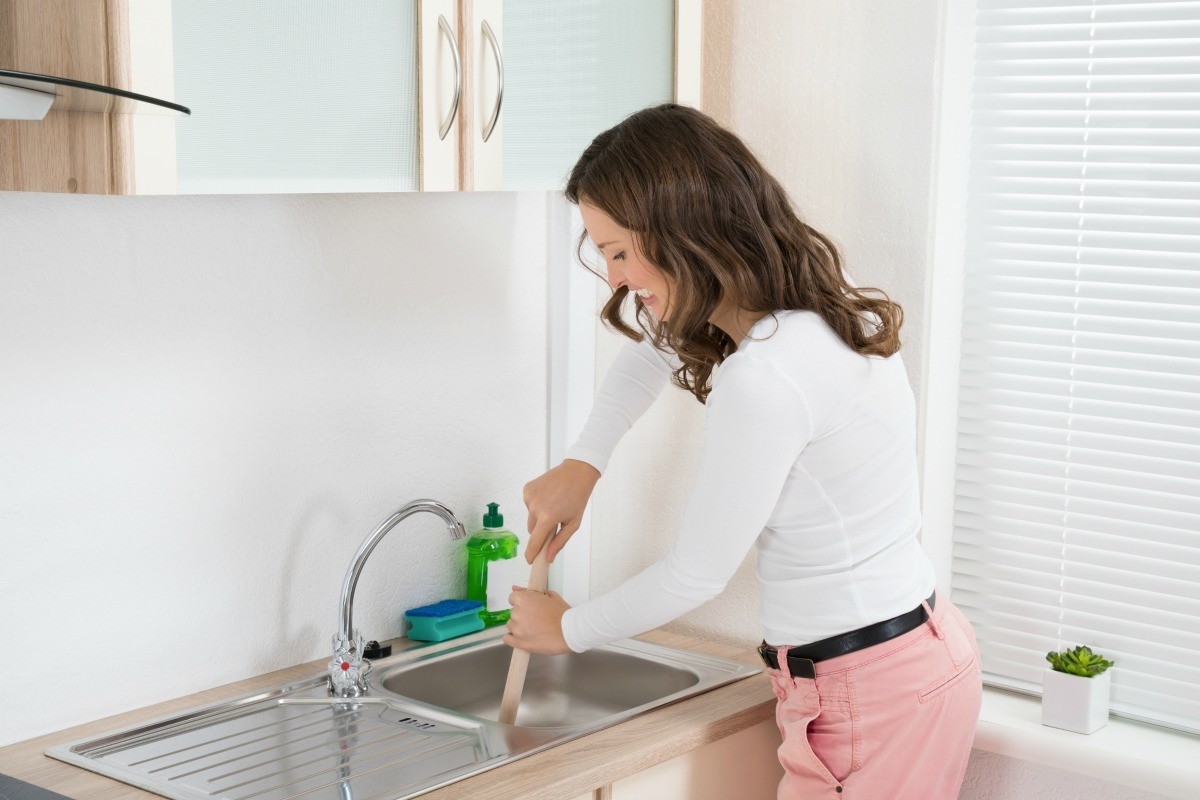
2. Add a generous amount of dish soap to the drain.
Clearing a clogged sink with dish soap is an easy way to get rid of any food particles, grease, or water that has built up over time. Add a generous amount of dish soap to the drain and turn on the faucet until the soap starts bubbling.
Use a plunger to suction onto the drain and push and pull until all of the debris is dislodged. Be sure to use plenty of elbow grease; this process can be tough if the drain is full of gunk. If you still have difficulty clearing the sink, call a professional plumber.
3. Allow the soap to sit for a few minutes
Clearing a clogged sink with dish soap can be done in a few simple steps. First, allow the soap to sit for a few minutes so that it can dissolve any built-up debris. Then, run hot water down the drain to help clear the obstruction. Finally, use a plunger or your hands to push and pull the soap and water through the drain until it is clear.
If your sink is clogged, the first step is to allow the soap to sit for a few minutes. This will help loosen any debris that may be blocking the drain. Then, run hot water down the drain until it starts flowing freely again.
4. You should see the clog start to dissolve.
When trying to clear a clogged sink with dish soap, start by pouring a small amount of the soap into the sink. Use your hands to create a lather and scrub the area around the drain. Pour more soap into the sink and continue scrubbing until you see the clog start to dissolve. Once the clog is gone, run hot water until it’s completely cleared.
Clearing a clogged sink with dish soap is an effective way to unclog it. Soap dissolves the dirt and grease that has built up over time, which allows water to flow through the drain more easily.
Pour a small amount of dish soap into the sink, and use your hands to work it into the clog. Use plenty of water to help wash away the soap, and be sure to flush the drain with hot water afterwards. If you still experience difficulty clearing the sink, call a professional plumber.
5. If your drain is still slow, you can repeat steps 2-4.
If your sink is still slow, you can try the following steps:
- Pour a pot of hot water into the sink. Add enough dish soap to cover the drain and let it sit for about 5 minutes.
- Clear any debris that has built up in the sink with a plunger.
- Pour a pot of cold water into the sink. Add enough ice to cover the drain and wait until it has frozen over.
- Use a plunger to break up the ice, and clear any debris that has built up in the sink.
6. Avoid letting grease and food go down the drain
Clearing a clogged sink with dish soap is one of the most common home repairs. Grease and food can easily get caught in the drain, leading to slow drainage and eventually a clogged sink. Here are some tips for preventing grease and food from going down the drain:
- Keep your kitchen clean. Dirty dishes will create more grease and food particles that can cause a clogged sink.
- Don’t overuse oil or butter in cooking. These fats tend to accumulate on cookware and end up in the drain.
- Avoid using too much salt when cooking; it can also lead to build-up in drains.
- Use cold water instead of hot water when washing dishes; this will help reduce the amount of dirt, grease, and food that ends up in the drain.
- Clear any debris from around your plumbing regularly; this includes cleaning out your garbage disposal, dishwasher hose connections, under sinks, etc.. This will help prevent blockages from forming downstream.
Regularly cleaning out your plumbing can help prevent blockages from forming downstream. This includes cleaning out your garbage disposal, dishwasher hose connections, under sinks, and more. By clearing any debris regularly you’ll reduce the chances of a problem developing down the line.
Final Thoughts
So, now that you know a few easy ways to clear a clogged sink with dish soap, it’s time to take action! The next time your sink gets clogged, try using a plunger or filling the sink with hot water and dish detergent. I hope this blog has been helpful! If you have more questions about clogged sinks, make sure you let me know in the comments below!

How to Draw a Padlock. Sometimes your property is in situations where it is at risk of being stolen or injured. This is unfortunate, but fortunately, We can take some steps to ensure this property is kept beautiful and safe.
Also, check our Bee Coloring Pages!
A lock is a simple device, but it’s very effective for keeping personal belongings safe and out of reach. They can come in many different shapes and sizes, and despite the simplicity of their design, learning how to draw a Padlock can be difficult. However, this tutorial is here because it will show you how to draw one of these handy devices quickly!
How to Draw A Padlock
Step 1
To get started with this guide to drawing a Padlock, let’s start by drawing the central part of the Padlock. As you draw this central part of the Padlock, try to keep the dimensions of this rectangular object if you were holding it in your hands.
Use two vertical lines close together for the thin side of the lock, and then use a slightly curved horizontal line for the base. Finish by drawing another slightly curved vertical line for the other side of the lock. The top will be empty, but we will fill it shortly!
Step 2
In this second part of your lock design, you’ll fill in the gaps left in the previous step. In this step, you will draw the top edge of the lock and again use slightly curved lines to connect all the previous edges of the lock.
As you draw, leave two relatively small gaps at the top. The reference image will show you how to place them, and these will later be where the metal bar of the lock will go. With this piece of block drawn, you are now ready for step 3.
Step 3
Without a keyhole, a padlock would be pretty useless as it would lock the owner and potential intruders out of his property! For this reason, it is best to add a keyhole in this step of our how-to draw a lock guide.
Lock hole placement may vary depending on the brand of lock, but it is on the front. The keyhole has a round top and then a rectangular section below. Add some more lines to add depth to this keyhole, and then we can move on.
Step 4
Another essential feature of the lock is the metal bar that extends from it. We draw this look for this part of your padlock design. In this step, you will also fill in the gaps left at the top of the lock in a previous step.
The smoother you get when drawing this bar, the better. There’s also a reasonably specific shape, so try to take it slow and replicate the lines as they appear in our reference image. Once the bar is drawn, you can move on to some final details in the next step!
Step 5
You are now ready to add the finishing touches in this fifth step of our how-to draw a Padlock guide! The entire profile of the Padlock is complete at this point, so we’ll now add more details for more realism.

To do this, we’ll add some thick and pretty straight lines on different sides of the lock to create some shading detail. You can even add more of that shading detail if you prefer! Before proceeding to the last step of the tutorial, you might want to draw some extra details as well.
What do you think this lock would protect? Could you show us some of your ideas by drawing a background for this picture? It would be exciting to see what you would use this lock for!
Step 6
This is the last step in drawing your Padlock; you can finish by adding colors to the picture. In our reference image, we used gold and yellow tones for the main body of the lock. This helps give this section the appearance of being made of polished bronze.
We used shades of gray for the bar to make it look more metallic. We chose these colors, but you could use many other colors! If you’re going for a metallic look, you can also stick a light sprinkling of gold or silver glitter on top to make the metal look shiny.
Your Padlock Drawing is Finished!
Also read: My Cat And I Love It: Outsunny Black Cat

Dead And Co Setlist What They Played At The Gorge Amphitheatre
Last weekend, Dead And Co Setlist descended upon the Gorge Amphitheatre in George, WA for their annual three-night run. As always, the boys delivered an amazing show, playing a mix of old favourites and new classics. If you weren’t able to make it out to the Gorge this year (or even if you did), here’s a look at the setlist from all three nights.
Dead & Company’s Setlist from their show at the Gorge Amphitheatre
Dead & Company’s Setlist from their show at the Gorge Amphitheatre:
1. “Bertha”
2. “Me and My Uncle”
3. “Ramble On Rose”
4. “When I Paint My Masterpiece”
5. “Althea”
6. “Cassidy”
7. “Don’t Ease Me In”
8. “Cold Rain and Snow”
9. “The Music Never Stopped”
10. “Deal”
11. “‘Til the Morning Comes”
Set 2:
12. “Help on the Way” >
13. “Slipknot!” >
14. “Franklin’s Tower”
15. Playin’ in the Band >
16. Uncle John’s Band >
17. Playin’ Reprise
18. Dark Star >
19 Drumz/Space > 20 Dark Star Reprise 21 Stella Blue 22 One More Saturday Night Encore: 23 Ripple
Highlights of the show
The show started with “Bertha” and included several other Grateful Dead classics like “Sugaree,” “Jack Straw,” “Deal,” and “Tennessee Jed.” The set also featured a couple of covers, including The Beatles’ “Dear Prudence” and Bob Dylan’s “All Along the Watchtower.”
The second set was even better, starting with an incredible “Fire on the Mountain” and a heart-stopping “Scarlet Begonias.” Other highlights from the second set include “Playin’ in the Band,” the classic jam vehicle, as well as a personal favorite, “Drums” > “Space.” The show ended with a beautiful performance of Jerry Garcia’s solo work, “Stella Blue.”
Final thoughts
This show was a celebration of life itself. After such a trying year, it is important to reflect on what we have accomplished and how lucky we are. I hope that everyone takes some time to think about this idea this month as we begin 2021.
What fans are saying about the show
The Grateful Dead have been one of the most influential bands in music history, and their fans are some of the most dedicated in the world. So when Dead & Company, a new band featuring original members Bob Weir and Mickey Hart, announced their first tour, fans were eager to see what they would do.
The band’s debut show at the Gorge Amphitheatre was a resounding success, with fans raving about the setlist. Highlights included renditions of classic Dead songs like “Bertha,” “Sugaree,” and “Althea,” as well as newer tunes like “Fire on the Mountain” and “Iko Iko.” The band also paid tribute to late Grateful Dead leader Jerry Garcia with a moving performance of “Black Muddy River.”
It’s clear that Dead & Company are already making waves with fans old and new. If their debut show is any indication, this is a band that is here to stay.
Setlist video
The setlist for Dead and Company’s show at the Gorge Amphitheatre was:
“Iko Iko”
“Bertha”
“New Speedway Boogie”
“Wharf Rat”
“He’s Gone”
“Fire on the Mountain”
“Drums/Space”
“The Other One”
“Stella Blue”
“Sugaree
Encore:
Touch of Grey
Upcoming Dead & Company tour dates
The wait is finally over! After a long hiatus, Dead & Company are back on tour and will be making their way to the Gorge Amphitheatre this summer. The tour kicks off on June 10th in Boulder, Colorado and will make its way across the country before concluding on July 6th in Boston, Massachusetts. Below is a list of all the upcoming tour dates:
Date June 10 – Boulder, CO @ Folsom Field
On June 13 – Albuquerque, NM @ Isleta Amphitheatre
June 15 – Phoenix, AZ @ Ak-Chin Pavilion
Check June 17 – Los Angeles, CA @ Hollywood Bowl
View June 20 – Mountain View, CA @ Shoreline Amphitheatre
June 22 – San Diego, CA @ Mattress Firm Amphitheatre
July 5 – Saratoga Springs, NY @ Saratoga Performing Arts Center
July 6 – Boston, MA @ Fenway Park

A comfortable environment enhances the beauty of a place, and hence carpets are a basic need nowadays. Carpets help in blocking invasive sounds, keep the atmosphere calm and warm, and add a soft feel under your feet. The market contains carpets in various colors, prints, and designs. Here come the unique designs of carpets that create confusion at installation time.
Two kinds of carpet styles are getting hyped nowadays, and people are getting crazy about them, and it has become difficult for them to choose one type for their place. These trendy designs are wall-to-wall carpets and carpet tiles. Both have a different series of importance if we see deeply; here, we have discussed the apparent difference between them to make you sure about the type you need.
Wall-To-Wall Carpets VS Carpet Tiles
- Wall-to-wall carpets are huge carpets that, when installed in a place, make a border around walls for a firm and classy look; because of this installation style, they are called wall-to-wall carpets.
- Carpet tiles are tile-shaped small carpets that do not require to be installed around walls. They are small with different vibrant colors and prints.
Some points have been discussed for a calm approach to your interior.
Installation
- Wall-to-wall installation of a vast carpet is hectic; you need a professional team. Installing a vast size carpet at a place requires protocol; they come in rolls, and handling a roll and fixing the carpet with the wall in a welcoming manner is difficult. Cutting and shaping the rug according to the room is a total waste of carpet roll and time. Moreover, the print can be destroyed if you don’t measure the place before buying the carpet roll.
- Carpet tiles installation is more straightforward than wall-to-wall carpets because they come in small sizes, are easy to handle, and are also designed with one sticky end where release paper is attached. Release the release paper and let it be stuck to the ground. You can also walk on them to confirm the firm grip of carpet tiles.
Uniform Appearance
- Wall-to-wall carpets are already printed by keeping in mind the floor appearance of the huge-sized place. Their color and prints look uniform in a home because the entire carpet is dyed simultaneously, and the prints have been installed on the carpet by looking at the whole carpet’s appearance. For luxurious patterns of carpets, buy wall-to-wall carpet tiles in Dubai.
- Carpet tiles are made separately, and because of their sharp shape, if they are installed in a place, they give a non-uniform appearance that looks awkward and unwelcoming, especially in a formal workplace. A wall-to-wall carpet looks more uniform and decent.
Prints and Colors
- The prints of wall-to-wall carpets look welcoming. They come in different unique prints. Their trendy prints are geometrical shapes, lines, and blocks. The range of their colors is a long list to match your decor theme.
- Carpet tiles come in solid, vibrant colors to combine with your wall theme. Their prints are not so famous because it is impossible to take care of a print while installing them.
Cost-effective Carpet Style
- The vast big wall-to-wall soft carpets are expensive because of their size and the fiber count they contain, and the natural carpets are comparatively less costly. They look more elegant in a place, but nowadays, people are moving towards naive ideas, so their enormous size makes them outdated.
- The carpet tiles are cost-effective and easy to install, so the installation expenses are also excluded. Finding ease in everything is the need of the day. The easy installation and maintenance of carpet tiles is the reason for their market demands.
Creative Ideas For Design
- Install a wall-to-wall carpet with the same colors and prints as it came. The image or color of the carpet decides the theme of your entire room. There will be no creative idea implementation.
- Carpet tiles come in different colors; measure the place, think about a fantastic idea, and install them the way you want. You can create an appealing dichromatic look, a multi-color dramatic look, or a monochromatic look for a maximum uniform appearance.
Cleaning & Maintenance
- The daily cleaning routine of a carpet depends on the fibers it is made of and the qualities it attains. But what about if a carpet got stained? It is a tough job to get rid of a stain on a vast carpet. Wash it off, and the clean area may get the mark too. You must take a professional maintenance service if the stain is stubborn and catchy. If still, it would not go away, throwing the whole carpet just because of a single stain is heartbreaking, and letting the stain stay where it is can add an unwelcoming look to your place.
- You can detach a single stained tile and wash it off to get rid of it; if the stain is stubborn, the single tile can be replaced at reasonable rates.
A Wind-up
Carpets are enormous but give a uniform appealing appearance to a place. While carpet tiles are small, their separation is prominent. Carpet tiles are easy to install and maintain, while many carpet installations and maintenance need professional services. Huge carpets are more expensive than carpet tiles. You can install a creative idea of your own with carpet tiles.
 Travel2 years ago
Practical And Essential Car Interior Accessories To Add Comfort And Convenience To Your Drive
 Business2 years ago
Top Reasons Why you Need to Consider Outsourcing Real Estate Photo Editing
- Business2 years ago
Dead And Co Setlist What They Played At The Gorge Amphitheatre
 Featured2 years ago
How to Make a Sports Career in India
 Health2 years ago
Garlic Is The Best Vegetable To Treat Heart Problems
 Sports2 years ago
How to watch the ETSU game -What are the benefits of watching the ETSU game?
 Health2 years ago
5 Reasons to Choose Turkey for Dental Treatments
 Travel2 years ago
Spectacular Hot Air Balloon Rides in Goa