Featured
How to Draw a Padlock
How to Draw a Padlock. Sometimes your property is in situations where it is at risk of being stolen or injured. This is unfortunate, but fortunately, We can take some steps to ensure this property is kept beautiful and safe.
Also, check our Bee Coloring Pages!
A lock is a simple device, but it’s very effective for keeping personal belongings safe and out of reach. They can come in many different shapes and sizes, and despite the simplicity of their design, learning how to draw a Padlock can be difficult. However, this tutorial is here because it will show you how to draw one of these handy devices quickly!
How to Draw A Padlock
Step 1
To get started with this guide to drawing a Padlock, let’s start by drawing the central part of the Padlock. As you draw this central part of the Padlock, try to keep the dimensions of this rectangular object if you were holding it in your hands.
Use two vertical lines close together for the thin side of the lock, and then use a slightly curved horizontal line for the base. Finish by drawing another slightly curved vertical line for the other side of the lock. The top will be empty, but we will fill it shortly!
Step 2
In this second part of your lock design, you’ll fill in the gaps left in the previous step. In this step, you will draw the top edge of the lock and again use slightly curved lines to connect all the previous edges of the lock.
As you draw, leave two relatively small gaps at the top. The reference image will show you how to place them, and these will later be where the metal bar of the lock will go. With this piece of block drawn, you are now ready for step 3.
Step 3
Without a keyhole, a padlock would be pretty useless as it would lock the owner and potential intruders out of his property! For this reason, it is best to add a keyhole in this step of our how-to draw a lock guide.
Lock hole placement may vary depending on the brand of lock, but it is on the front. The keyhole has a round top and then a rectangular section below. Add some more lines to add depth to this keyhole, and then we can move on.
Step 4
Another essential feature of the lock is the metal bar that extends from it. We draw this look for this part of your padlock design. In this step, you will also fill in the gaps left at the top of the lock in a previous step.
The smoother you get when drawing this bar, the better. There’s also a reasonably specific shape, so try to take it slow and replicate the lines as they appear in our reference image. Once the bar is drawn, you can move on to some final details in the next step!
Step 5
You are now ready to add the finishing touches in this fifth step of our how-to draw a Padlock guide! The entire profile of the Padlock is complete at this point, so we’ll now add more details for more realism.
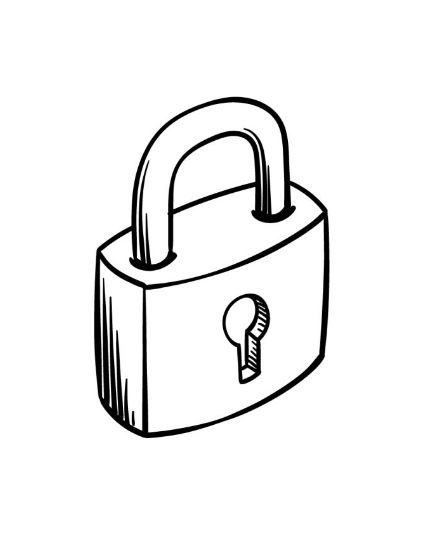
To do this, we’ll add some thick and pretty straight lines on different sides of the lock to create some shading detail. You can even add more of that shading detail if you prefer! Before proceeding to the last step of the tutorial, you might want to draw some extra details as well.
What do you think this lock would protect? Could you show us some of your ideas by drawing a background for this picture? It would be exciting to see what you would use this lock for!
Step 6
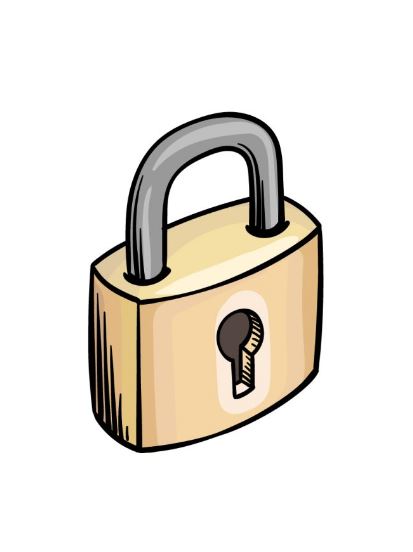
This is the last step in drawing your Padlock; you can finish by adding colors to the picture. In our reference image, we used gold and yellow tones for the main body of the lock. This helps give this section the appearance of being made of polished bronze.
We used shades of gray for the bar to make it look more metallic. We chose these colors, but you could use many other colors! If you’re going for a metallic look, you can also stick a light sprinkling of gold or silver glitter on top to make the metal look shiny.
Your Padlock Drawing is Finished!
Also read: My Cat And I Love It: Outsunny Black Cat

In 2022, the top 5 best YouTubers will be Casey Neistat, PewDiePie, Jenna Marbles, Lilly Singh, and Connor Franta. Casey Neistat is a filmmaker and YouTuber who is known for his creative and interesting videos. His channel has over 7 million subscribers and over 1.2 billion views. PewDiePie is a Swedish YouTuber who is best known for his hilarious and outrageous gaming videos. His channel has over 55 million subscribers and over 18 billion views. Jenna Marbles is an American YouTuber who is best known for her hilarious vlogs. Her channel has over 17 million subscribers and over 3.5 billion views. Lilly Singh is a Canadian YouTuber who is best known for her hilarious and motivational videos. Her channel has over 14 million subscribers and over 2.5 billion views. Connor Franta is an American YouTuber who is best known for his inspiring and personal vlogs. His channel has over 6 million subscribers and over 1.5 billion views.
asmongold girlfriend
Hello, everyone! My name is Asmongold, and I’m a professional video game commentator and streamer on Twitch.tv. I’m also dating the most beautiful and amazing woman in the world, who goes by the name of Asmongold girlfriend. She’s my best friend, and I love her more than anything in the world. I’m so lucky to have her in my life, and I know that she’s the one for me. Thank you for taking the time to read this, and I hope you have a great day!
Casey Neistat
Casey Neistat is a filmmaker, YouTuber, and entrepreneur who first gained recognition for his work on the HBO series “The Neistat Brothers”. In 2010, he started his YouTube channel, which has since grown to over 8 million subscribers. Casey is known for his creative and clever filmmaking, as well as his willingness to take risks. In 2016, he and his business partner started the social media app Beme, which was later acquired by CNN. Casey is a master of creating content that is both creative and engaging. His videos are always well-made and interesting, and he frequently uses creative techniques like time-lapse and first-person point-of-view shots. He is also unafraid to take risks, which often leads to some of his most successful videos. For example, in one of his most popular videos, he flew a drone through the narrow streets of New York City. In addition to his filmmaking skills, Casey is also a savvy entrepreneur. In 2016, he and his business partner started the social media app Beme, which was later acquired by CNN. Beme was a unique app that allowed users to share short videos of themselves with their friends. However, it ultimately failed to gain a large following and was shut down by CNN in January of 2017. Despite the failure of Beme, Casey is still a very successful entrepreneur. In January of 2017, he announced that he was partnering with CNN to create a new media company. The company will focus on creating short-form content for online distribution. Overall, Casey Neistat is a talented filmmaker and entrepreneur who is always creating interesting and engaging content. He is unafraid to take risks, which often leads to some of his most successful videos. He is also a savvy entrepreneur, and his experience with Beme will no doubt help him with his new venture with CNN.
PewDiePie
is a Swedish YouTube personality who is known for his gaming commentary videos. He has gained a large following on the video-sharing site and has been compared to other popular YouTube stars such as Smosh and Shane Dawson. PewDiePie was born and raised in Sweden. He graduated from the Chalmers University of Technology with a degree in industrial economics and technology management. PewDiePie first started making videos in 2010, and his first videos were commentaries of other people’s gameplay videos. In 2012, he started uploading videos of himself playing video games, and his channel quickly gained a following. His videos are typically characterized by his energetic and enthusiastic commentary. PewDiePie’s channel currently has over 33 million subscribers, and his videos have been watched over 3.4 billion times. He was listed by Forbes as the highest-paid YouTube star in 2016, with estimated earnings of $15 million. In addition to his YouTube career, PewDiePie also has a music career. He has released two albums and several singles. He also created a web series for YouTube Red called Scare PewDiePie.
Logan Paul
8th January, 2018 As a YouTuber and social media influencer, Logan Paul understands the importance of creating engaging and interactive content. His daily vlogs are a prime example of this, as they consistently explore different and unique content ideas that keep his viewers hooked. In terms of Logan Paul’s brand, his main demographic is focused on the younger generation – typically those aged between 16-24. This is primarily because of the type of content that he produces, which is often irreverent, humorous and somewhat reckless. Due to this, it’s unsurprising that Logan Paul has been able to amass over 15 million subscribers on YouTube. What’s also worth noting is that Logan Paul is a shrewd business man. In addition to his successful YouTube channel, he has also ventured in to other business opportunities such as endorsements, merchandising and live events. This makes him an attractive proposition for brands and businesses looking to partner with a social media influencer.
Emma Chamberlain
Blogger, vlogger, and social media personality Emma Chamberlain is one of the most popular up-and-coming young stars on the internet. With over 4.5 million followers on Instagram and 1.2 million subscribers on YouTube, Chamberlain is known for her hilarious and relatable videos about her life as a teenager. Chamberlain first started making videos in 2016, when she was just 14 years old. Her early videos were mostly vlogs about her life and her experiences as a high school student, but she soon began to experiment with different types of content, including prank videos, makeup tutorials, and challenge videos. In 2018, Chamberlain’s channel reached a new level of popularity when she started making videos about her relationship with her then-boyfriend, YouTuber and musician Alex Ernst. The two had been dating for about six months when they started making videos about each other, and their videos quickly gained a large following. However, Chamberlain and Ernst eventually broke up in early 2019, and Chamberlain has since started making more solo videos. She has also begun to experiment with other types of content, including music videos and vlogs about her mental health. Despite the fact that her relationship with Ernst didn’t last, Chamberlain’s popularity continues to grow, and she is now one of the most influential young social media stars in the world.

There are many great English singer songwriters, but in my opinion, these are the top 5. 1. Adele Adele is undoubtedly one of the greatest singers and songwriters of our time. Her voice is soulful and powerful, and her songs are full of emotion and depth. She has achieved massive success both in the UK and the US, and her albums have been certified multi-platinum. 2. Ed Sheeran Ed Sheeran is another hugely popular singer songwriter. His music is acoustic and folk-inspired, and his lyrics are often introspective and personal. He has had massive success in the UK and the US, and his songs have been used in numerous TV shows and films. 3. Coldplay Coldplay are one of the most successful bands of all time, and their music is a mix of alternative rock and pop. Their songs are often emotive and spiritual, and they have achieved massive success both in the UK and the US. 4. Amy Winehouse Amy Winehouse was a hugely talented singer songwriter who tragically passed away at a young age. Her music was soulful and jazz-inspired, and she won numerous awards including 5 Grammys. 5. The Beatles The Beatles are one of the most iconic and successful bands of all time. Their music is a mix of rock, pop and folk, and their lyrics are often poetic and introspective. They are the best-selling band in history, and their albums have been certified multi-platinum.
dua lipa dad
There’s no one quite likedua lipa dad dad. He’s always been there for her, whether she’s needed a listening ear or a good laugh. And, as she’s become one of the world’s biggest pop stars, he’s been there to share in her success. Dua’s dad first showed her his musical talent when he started playing the guitar and writing songs for her when she was just a little girl. And she’s always been grateful for his support. In a recent interview, Dua said: “He’s always been my biggest fan. He’s always been the one who’s been like, ‘You can do this, you can do better, you can do anything.’” Dua Lipa’s dad is a huge part of her life – and she’s always been proud of that. In a 2016 interview, she said: “I’m really close with my dad. I think that’s really important, especially in the industry that I’m in. I think it’s really important to have someone that you can just be yourself around and not feel the pressure to put on a show.” And it seems that Dua Lipa’s dad is just as proud of her as she is of him. In a 2017 interview, he said: “I am so proud of her. I can’t tell you. I get emotional every time I talk about it. She is doing amazingly well.” We can’t wait to see what Dua Lipa and her dad will do next!
English Singer Songwriters in the Modern World
The art of the singer-songwriter has been around since the beginning of time, with people like Homer and Orpheus creating beautiful pieces of music that told stories and conveyed emotion. However, in the modern age, the singer-songwriter has taken on a new form, one that is often more personal and introspective than ever before. This is due, in part, to the ever-growing popularity of the singer-songwriter genre. In a world where people are constantly inundated with noise and distractions, the singer-songwriter offers a respite, an opportunity to connect with someone who is vulnerably sharing their thoughts and feelings. This is not to say that all singer-songwriters are introspective, or that all introspective music is good. However, the best of the genre often manage to find a way to connect with their listeners on a deep level, making them feel understood and appreciated. This is a powerful tool, and one that is often undervalued in today’s society. In a world that is constantly moving and changing, the singer-songwriter offers a chance to slow down and appreciate the small things.
Celebrating English Singer Songwriters
English singer songwriters have a long and illustrious history, with many of the greatest and most famous songs in the world originating from our small island. From the Beatles and the Rolling Stones to Adele and Ed Sheeran, English singer songwriters have always been at the forefront of popular music, writing and performing some of the most iconic and timeless tracks of all time. There’s something about the English music scene that seems to produce brilliant singer songwriters time and time again, and it’s a tradition that looks set to continue well into the future. So if you’re a fan of great music, then be sure to check out some of the best English singer songwriters out there!
Origins of English Singer Songwriters
When we think about English singer songwriters, the first names that come to mind are likely Adele, Ed Sheeran, or Sam Smith. But what is it that makes these artists so special? And where did they get their start? Most English singer songwriters start out playing in small pubs and clubs. They use these gigs as a way to hone their skills and build up a following. They also use these gigs to test out new material. This is a great way to get feedback from the audience and see what songs they connect with the most. Once the singer songwriter has a few songs that they feel really confident with, they will typically start to record them. This can be done in a variety of ways, such as recording them in a home studio or even recording them in a professional studio. Once the songs are recorded, the singer songwriter will typically start to look for a record label to sign them. This can be a daunting task, but if the singer songwriter is talented and has a great songwriting skills, they can typically find a record label that is interested in working with them. Once the singer songwriter has a record deal in place, they will typically start to work on their debut album. This can be a very time consuming process, but if the singer songwriter is hardworking and motivated, they can typically finish the album within a year or so. Once the album is finished, the singer songwriter will start to promote it. This can include anything from doing interviews to performing live shows. If the singer songwriter is lucky, they will have a hit album and will start to gain a lot of traction in the music industry. This can lead to a lot of success and can even help the singer songwriter score some major awards. So, what is it that makes English singer songwriters so special? It’s their passion for music, their drive to succeed, and their incredible songwriting skills.
The Rise of English Singer Songwriters
In the 1960s, the British Invasion brought a host of new, talented English singer-songwriters to the United States. These artists, including The Beatles, The Moody Blues, and The Kinks, popularized the singer-songwriter genre, blending pop and rock music with poetic lyrics. Since then, English singer-songwriters have continued to dominate the music scene. Some of the most successful and well-known artists include Adele, Ed Sheeran, and Sam Smith. What sets English singer-songwriters apart from other artists is their ability to write catchy, melodic songs that resonate with listeners. Their lyrics are often introspective and emotional, exploring themes of love and loss. English singer-songwriters are also known for their live performances. They often play guitar and piano, and their shows are full of energy and emotion. If you’re interested in discovering some of the best English singer-songwriters, check out the artists listed below. You won’t be disappointed!
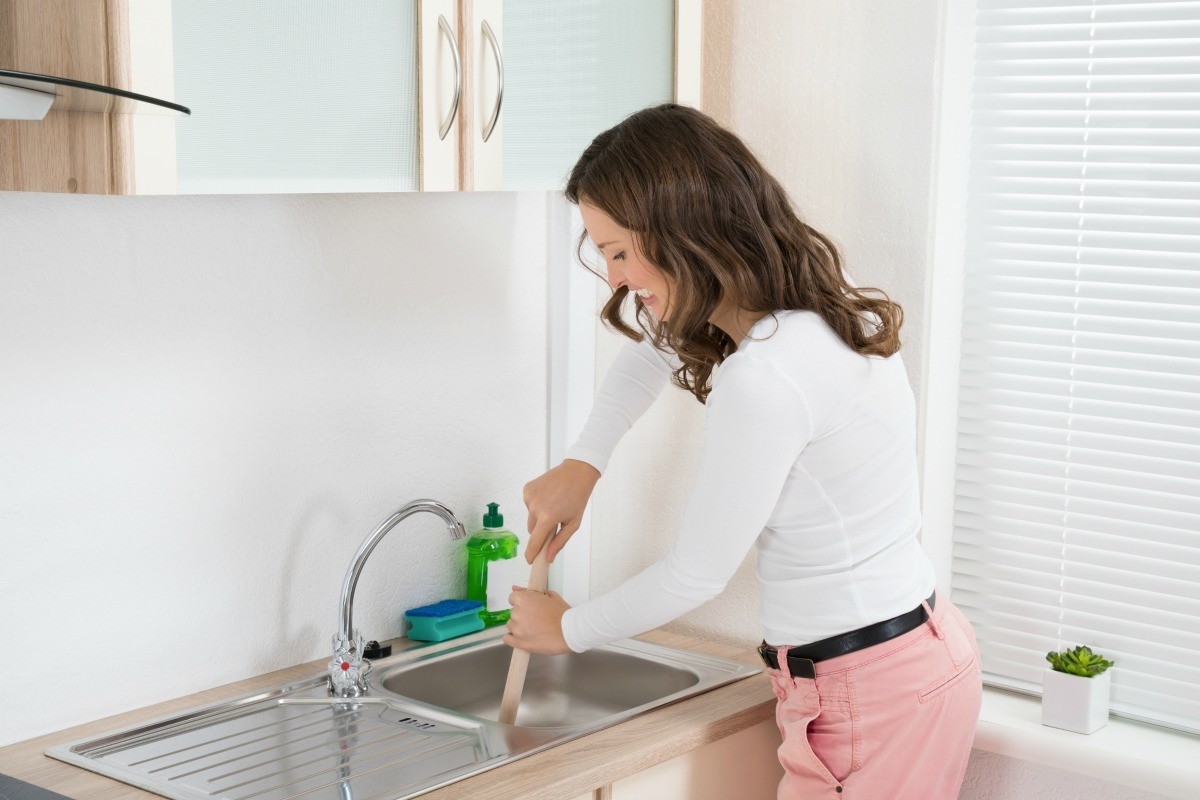
No matter how hard we try to avoid it, we all experience clogged sinks from time to time. Clogged sinks can be caused by a variety of reasons, including hair buildup, soap scum, and food waste.
Did you know that when you pour dish soap down the drain it can actually help clear a clogged sink? It’s true! In this blog post, we’re going to take a look at some easy tips for clearing a clogged sink with dish soap. Keep reading to learn more!
1. Boil a pot of water and pour it down the drain.
If you have a clogged sink, the first step is to boil some water and pour it down the drain. This will help loosen up any build-up in the sink and make it easier to clean. Next, use dish soap to scrub the area where the clog is located. Be sure to use plenty of soap and hot water; otherwise, you could end up damaging your pipes. Finally, pour a pot of cold water down the drain to clear out any leftover soap solution.
If your sink is clogged, the first thing you should do is try boiling a pot of water and pouring it down the drain. This will help to loosen any clogs. If that doesn’t work, you can use a plunger to clear the obstruction. Finally, if all else fails, you can call a plumber – Rørlegger Ski.
2. Add a generous amount of dish soap to the drain.
Clearing a clogged sink with dish soap is an easy way to get rid of any food particles, grease, or water that has built up over time. Add a generous amount of dish soap to the drain and turn on the faucet until the soap starts bubbling.
Use a plunger to suction onto the drain and push and pull until all of the debris is dislodged. Be sure to use plenty of elbow grease; this process can be tough if the drain is full of gunk. If you still have difficulty clearing the sink, call a professional plumber.
3. Allow the soap to sit for a few minutes
Clearing a clogged sink with dish soap can be done in a few simple steps. First, allow the soap to sit for a few minutes so that it can dissolve any built-up debris. Then, run hot water down the drain to help clear the obstruction. Finally, use a plunger or your hands to push and pull the soap and water through the drain until it is clear.
If your sink is clogged, the first step is to allow the soap to sit for a few minutes. This will help loosen any debris that may be blocking the drain. Then, run hot water down the drain until it starts flowing freely again.
4. You should see the clog start to dissolve.
When trying to clear a clogged sink with dish soap, start by pouring a small amount of the soap into the sink. Use your hands to create a lather and scrub the area around the drain. Pour more soap into the sink and continue scrubbing until you see the clog start to dissolve. Once the clog is gone, run hot water until it’s completely cleared.
Clearing a clogged sink with dish soap is an effective way to unclog it. Soap dissolves the dirt and grease that has built up over time, which allows water to flow through the drain more easily.
Pour a small amount of dish soap into the sink, and use your hands to work it into the clog. Use plenty of water to help wash away the soap, and be sure to flush the drain with hot water afterwards. If you still experience difficulty clearing the sink, call a professional plumber.
5. If your drain is still slow, you can repeat steps 2-4.
If your sink is still slow, you can try the following steps:
- Pour a pot of hot water into the sink. Add enough dish soap to cover the drain and let it sit for about 5 minutes.
- Clear any debris that has built up in the sink with a plunger.
- Pour a pot of cold water into the sink. Add enough ice to cover the drain and wait until it has frozen over.
- Use a plunger to break up the ice, and clear any debris that has built up in the sink.
6. Avoid letting grease and food go down the drain
Clearing a clogged sink with dish soap is one of the most common home repairs. Grease and food can easily get caught in the drain, leading to slow drainage and eventually a clogged sink. Here are some tips for preventing grease and food from going down the drain:
- Keep your kitchen clean. Dirty dishes will create more grease and food particles that can cause a clogged sink.
- Don’t overuse oil or butter in cooking. These fats tend to accumulate on cookware and end up in the drain.
- Avoid using too much salt when cooking; it can also lead to build-up in drains.
- Use cold water instead of hot water when washing dishes; this will help reduce the amount of dirt, grease, and food that ends up in the drain.
- Clear any debris from around your plumbing regularly; this includes cleaning out your garbage disposal, dishwasher hose connections, under sinks, etc.. This will help prevent blockages from forming downstream.
Regularly cleaning out your plumbing can help prevent blockages from forming downstream. This includes cleaning out your garbage disposal, dishwasher hose connections, under sinks, and more. By clearing any debris regularly you’ll reduce the chances of a problem developing down the line.
Final Thoughts
So, now that you know a few easy ways to clear a clogged sink with dish soap, it’s time to take action! The next time your sink gets clogged, try using a plunger or filling the sink with hot water and dish detergent. I hope this blog has been helpful! If you have more questions about clogged sinks, make sure you let me know in the comments below!
 Travel2 years ago
Practical And Essential Car Interior Accessories To Add Comfort And Convenience To Your Drive
 Business2 years ago
Top Reasons Why you Need to Consider Outsourcing Real Estate Photo Editing
 Business2 years ago
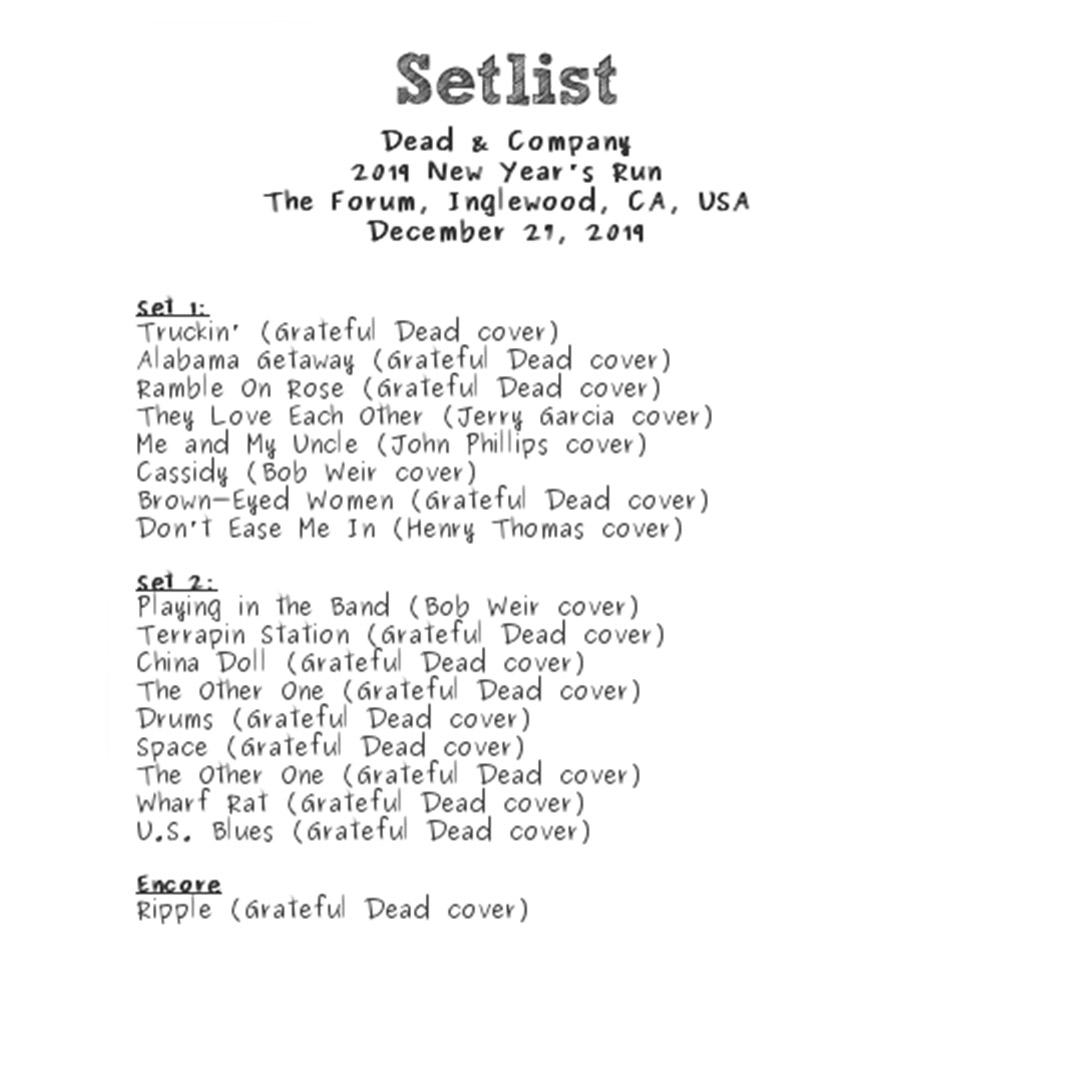
Dead And Co Setlist What They Played At The Gorge Amphitheatre
 Featured2 years ago
How to Make a Sports Career in India
 Health2 years ago
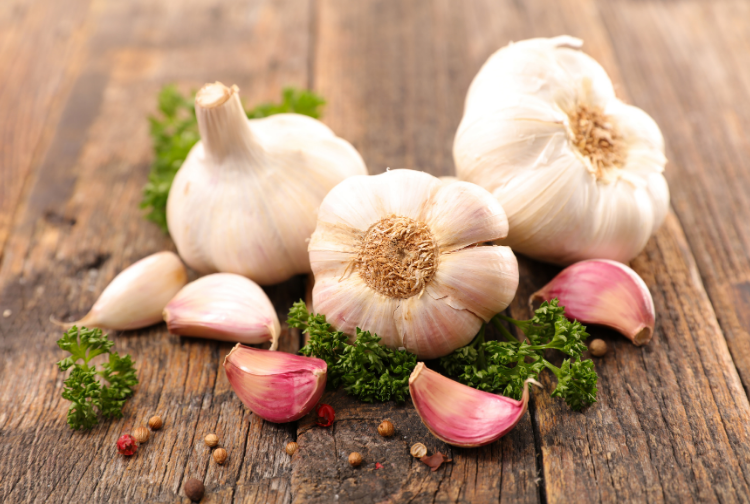
Garlic Is The Best Vegetable To Treat Heart Problems
 Sports2 years ago
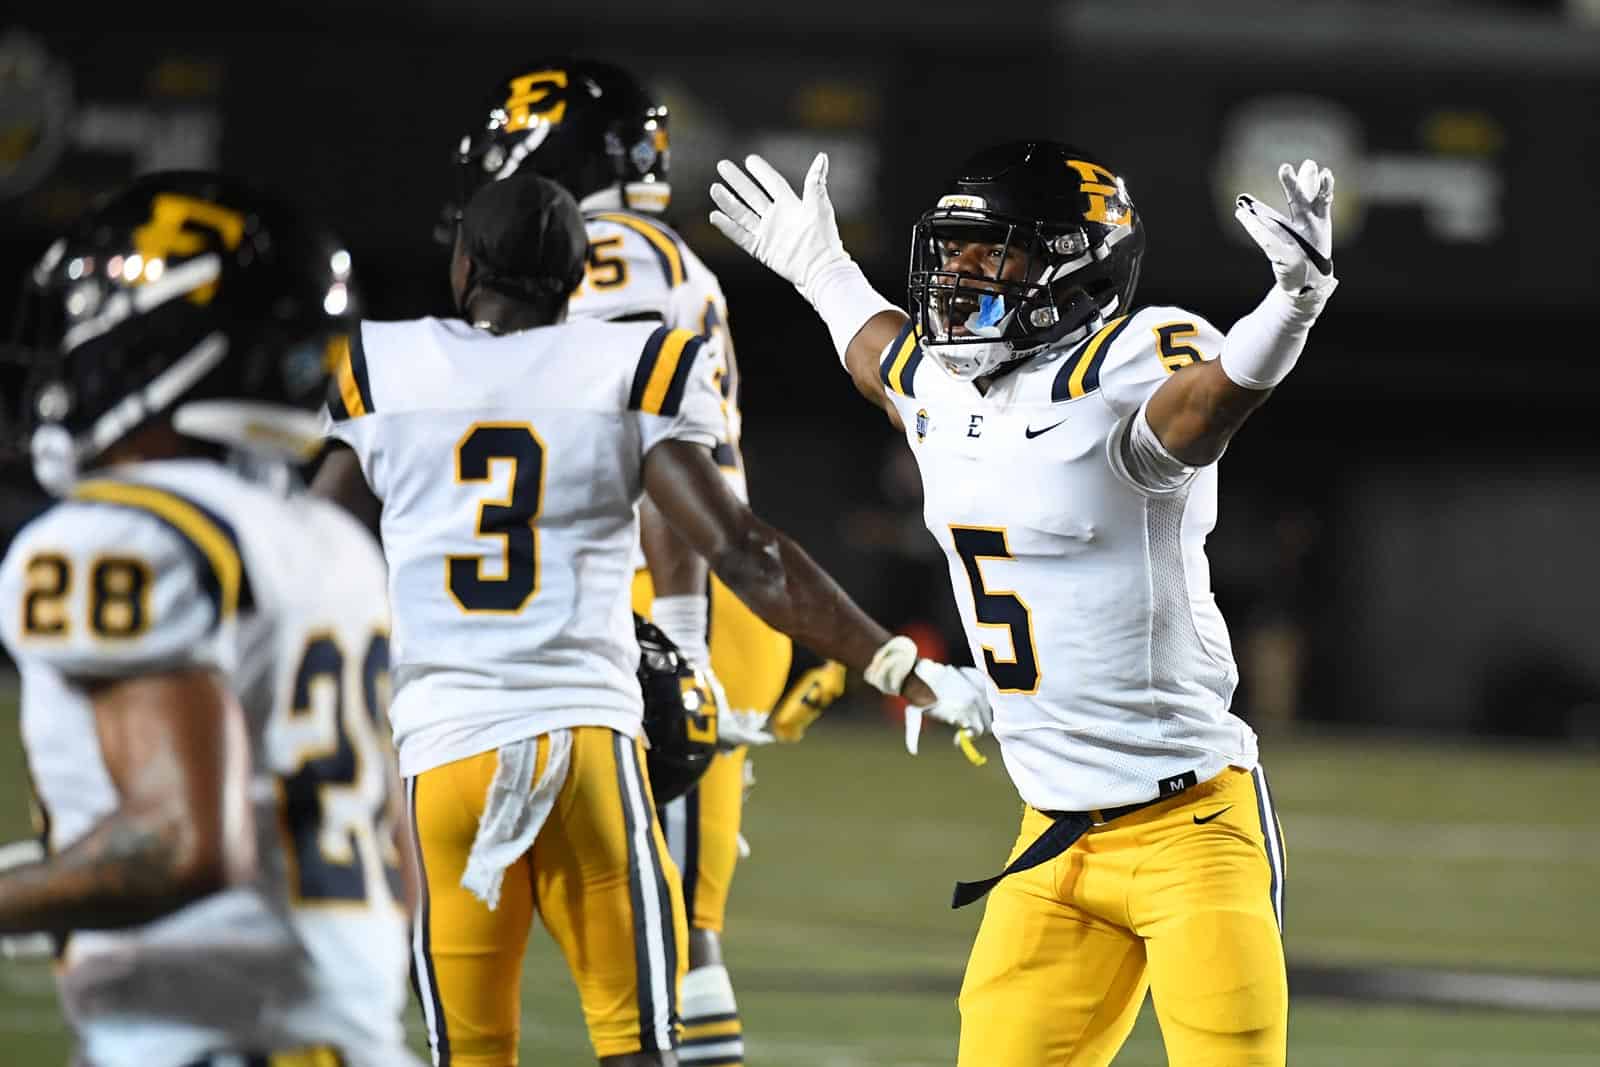
How to watch the ETSU game -What are the benefits of watching the ETSU game?
 Health2 years ago
5 Reasons to Choose Turkey for Dental Treatments
 Travel2 years ago
Spectacular Hot Air Balloon Rides in Goa