Featured
First scuba dive experience

Introduction
There is always a first time for everything. The firsts are full of excitement, adventure, a lot of questions, a lot of thoughts, fear, joy, and whatnot. Your first scuba dive experience will be full of joy. There are things you should have added to your bucket list. Well, you should add scuba diving to your bucket list very fast. Do you want to know why? Because this activity will take you to another world.
There is no other sport like scuba diving. Well, if you are confused with the thing that what is scuba diving? Will I be able to do that? Is it scary? And so on. You should be full of questions right now. Well, do not take tension because in this article we are going to tell you everything about scuba diving that will make your first scuba dive experience full of excitement.
About Scuba diving
Well, if you do not know what is scuba diving then let me clear up your question. You will swim underwater wearing some special equipment for breathing. You will be exploring marine life very closely. Do not worry you do not need any prior experience in scuba diving.
But if you want to go very deep into the ocean then only you need to know a little bit about swimming. It is an adventurous underwater sport. You will feel like you are flying under the water. You will just see another life that does not resemble you but is beautiful.
Now, we should talk about who can do scuba diving.
This is a very important thing to discuss. Well, let me tell you that anyone above 10 can do this sports activity. You just need good physical fitness for scuba diving and, the willpower to explore this world. Most important you should feel comfortable with water. You are good to go for this amazing activity.
The Guide to the activity
You will be guided with everything which you need to know about. If you already do swimming then this will be a little easy for you but if you are not familiar with water then you must be scared a little bit. Once you are surrounded with anxiety and fear then you may think of not doing it. But do not let your mind decide not to do this. This will be the biggest mistake of your life.
Now, let us talk about the cost and price of scuba diving in the Andaman and Nicobar Islands. Well, it depends upon what kind of dive you want deeper or, not so deeper also what school you choose.
Types of Scuba
A single dive – the estimate is Rupees 4500 to 5000 which includes an introduction session of scuba diving and a guide with an instructor.
Two dives – the estimate is Rupee 6000 to 7000 which includes an introduction session of scuba diving and a guide with an instructor.
Scuba lite- In rupees 3500 you will get a short intro scuba dive session but without any instructor. Your time under the water will be half an hour.
So this is all about the cost you will get to pay in Andaman and Nicobar Islands if you go for a scuba dive here.
The Padi experience
Well, if you have signed up for a PADI discover scuba dive experience then you will be provided a brief introduction to scuba diving. You will be getting a small pool session. This pool session is for those who do not know swimming or for the ones who are weak swimmers. This small pool session will make you get comfortable with water. You will know what you should do and what you should not do.
The instructor will tell you how to wear a BCD jacket. You will wear some equipment that will help you to breathe when you will in water. There will be only two cases whether you will love it a lot or you will hate it. Well, once you are done with all the sessions. You are good to go scuba diving.
Scuba: An interesting activity
Well, kids are always keen to learn new things. Not only that kids learn things very quickly. This is the reason kids are more interested in scuba diving than adults.
Well, once you are under the water. You will be able to feel the marine life. Your instructor will always be there for you.
For the very first time, your instructor will be taking you into the deep ocean while holding your hands. Well, if it is your first time you will be around 40 feet under the water. This 40 to 50 minutes dive into the water will take you to another world.
Well, you will be a little scared in the first few minutes. You will not feel like you are breathing. But do not panic start slowly. Make yourself feel relaxed under the water. This will help you to get comfortable and explore more.


You can carefully operate your agricultural machinery and equipment, always choose original spare parts, and still encounter breakdowns and loss of productivity. How and why might this happen? Just skimp on fuel and lubrication materials or buy them from unreliable sources.
It is not necessary to spend a lot of money, but it is always important to pay attention to the subtleties of the choice.
Here are a few of them:
- Don’t be lazy, open the service book of your machinery or equipment and carefully read the characteristics.
- Octane number is a very important, do not ignore this indicator.
- Climatic conditions and their changes affect engine operation. For example, diesel fuel can thicken in winter; winter fuel should be used.
- The presence of international standards and certificates indicates the reliability of the manufacturer; always check their availability among all fuels and lubricants for sale.
- Don’t experiment with alternative types of fuels. Be sure to check if they are compatible with your equipment.
You should also be responsible with lubricants. Each lubricant has characteristics that are suitable for a specific type of equipment. You can select engine oils, bearings, and so on. The most important technical characteristic is viscosity. Compliance with the indicators will ensure proper operation.
You can now buy lubricants and fuel additives online on one website: https://usa.vas.trade/fuel-and-lubricants-materials, without wasting extra time searching. “VAS” agricultural bulletin board is designed to enable the farmer to shop securely wherever he is and can buy all-important items in one place.
However, this is not a complete description. The entire site is a clear yet in-depth catalog of agricultural products and services. Any action on the website, except advertising and promotion, is free and without any hidden commissions.
Wholesale fuels & lubricants, like retail ones, are in the same section. Using sorting tools, you can highlight the ones you need and further speed up the search for products. Each ad has a detailed description, photos from all sides and video reviews from YouTube.
To purchase, you need to write to the online chat or call; the phone number is always in the publication.
If the seller has the “negotiated price” button active, you can safely start bargaining. Reviews about the seller are visible on the page, which will help you decide on purchasing the product much faster.
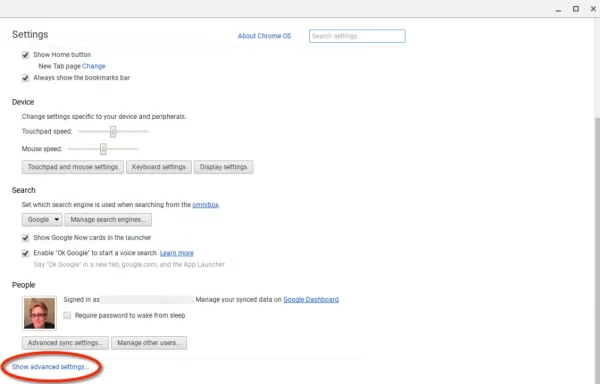
The article is briefing about “orange box on chromebook”. Chromebooks are renowned for their simplicity and reliability, but occasional issues may arise. One such issue is the appearance of an orange box on the screen, which can be puzzling for users. In this guide, we’ll delve into the causes of the orange box on Chromebook and explore effective solutions to resolve it.
Introduction to Chromebook Orange Box Issue
The orange box issue on Chromebook refers to a notification or visual indicator that appears unexpectedly on the screen, causing confusion and inconvenience for users. Understanding the root cause of this issue is essential for troubleshooting and restoring normal functionality.
Understanding the Orange Box Notification
The orange box notification typically appears in the corner of the screen or within a specific application window on Chromebook. It may indicate various issues, including system updates, network connectivity problems, or software conflicts. Identifying the specific cause of the orange box is the first step towards resolving the issue.
Causes of the Orange Box on Chromebook
Several factors may contribute to the appearance of this box on Chromebook, including:
- Software glitches or bugs
- Outdated system software
- Network connectivity issues
- Corrupted cache or cookies
- Incompatible browser extensions or settings
Resolving The Issue
To resolve the orange box issue on Chromebook, try the following methods:
Method 1: Restarting Your Chromebook
A simple restart can often resolve temporary glitches or software conflicts that may be causing this to appear.
Method 2: Checking for Updates
Ensure that your Chromebook’s operating system and applications are up to date by checking for and installing any available updates.
Method 3: Clearing Cache and Cookies
Clearing your Chromebook’s cache and cookies can help resolve browser-related issues and improve overall performance.
Method 4: Resetting Chrome Settings
Resetting your Chrome browser settings to their default values can help eliminate any misconfigurations or conflicts that may be causing the box to appear.
Method 5: Running the Chromebook Diagnostics
Chromebooks come with built-in diagnostic tools that can help identify and resolve hardware or software issues. Running diagnostic tests may provide insight into the underlying cause of the box problem.
Seeking Professional Help
If this issue persists despite troubleshooting efforts, consider seeking assistance from Chromebook support forums or contacting Google support for further assistance.
Tips to Prevent the Orange Box Issue
- Regularly update your Chromebook’s operating system and applications.
- Avoid installing unnecessary browser extensions or plugins.
- Practice safe browsing habits and avoid visiting suspicious websites.
- Perform routine maintenance tasks, such as clearing cache and cookies, to keep your Chromebook running smoothly.
Conclusion
In conclusion, the orange box issue on Chromebook can be a minor annoyance, but with the right troubleshooting steps, it can be resolved effectively. By understanding the causes of the this and implementing proactive measures to prevent it, users can enjoy a seamless and trouble-free Chromebook experience.
FAQs
What does the orange box on Chromebook signify?
- This box on Chromebook typically signifies a notification or alert. It can indicate various issues such as system updates, network connectivity problems, or software conflicts.
Why is my Chromebook showing an orange box after startup?
- If your Chromebook is showing this after startup, it could be due to several reasons. It may indicate pending system updates, network connection issues, or software conflicts that need attention.
How can I troubleshoot the orange box issue on my Chromebook?
- To troubleshoot the this issue on your Chromebook, you can try the following steps:
- Restart your Chromebook to see if the issue resolves itself.
- Check for and install any pending system updates.
- Ensure that your Chromebook is connected to a stable Wi-Fi network.
- Clear cache and cookies in your Chrome browser.
- Reset Chrome settings to default values.
- Run Chromebook diagnostics to identify any hardware or software issues.
Does the this indicate a hardware or software problem?
- It indicates a software-related issue rather than a hardware problem. It’s often caused by software glitches, outdated system software, network connectivity issues, or browser conflicts.
Is the orange box issue common on all Chromebook models?
- This issue may occur on any Chromebook model, although its frequency and severity may vary. It’s a common software-related issue that can usually be resolved through troubleshooting steps outlined by Chromebook users and support forums.

A question raised a while “how to remove something from continue watching on peacock”. Peacock, NBCUniversal’s streaming service, offers a seamless viewing experience with its “Continue Watching” feature, allowing users to pick up where they left off across different devices. However, managing your “Continue Watching” list becomes essential for a clutter-free and personalized streaming experience. Here’s how you can remove something from “Continue Watching” on Peacock.
Introduction to Peacock’s “Continue Watching” Feature
Peacock’s “Continue Watching” feature remembers your progress in TV shows, movies, and other content, enabling you to resume watching from where you left off. While convenient, the list can quickly become cluttered with unfinished content, prompting the need for management.
Understanding the Importance of Managing “Continue Watching”
Managing your “Continue Watching” list is crucial for maintaining a streamlined viewing experience. By removing unwanted or unfinished items, you can focus on content that truly interests you and discover new favorites without distractions.
Why You Might Want to Remove Items from “Continue Watching”
There are several reasons why you might want to remove items from your “Continue Watching” list on Peacock. These include wanting to declutter your list, removing content you’re no longer interested in, or starting fresh with recommendations based on your current preferences.
How to Remove Items from “Continue Watching” on Peacock
Removing items from your “Continue Watching” list on Peacock is a straightforward process. Follow the steps below to tidy up your viewing history and personalize your streaming experience.
Step-by-Step Guide to Removing Items from “Continue Watching”
Open Peacock App:
- Launch the Peacock app on your preferred device or visit the Peacock website in your browser.
Navigate to “Continue Watching”:
- Locate the “Continue Watching” section on the homepage or in the main menu of the Peacock app.
Select the Content to Remove:
- Scroll through your “Continue Watching” list and select the content you want to remove.
Access Options Menu:
- Look for the three dots or ellipsis icon next to the selected item to access the options menu.
Choose “Remove from Continue Watching”:
- Select the “Remove from Continue Watching” option from the menu.
Confirm Removal:
- Confirm your decision to remove the item from your “Continue Watching” list when prompted.
Repeat if Necessary:
- Repeat the process for any additional items you wish to remove from your list.
Alternative Solutions and Workarounds
In addition to removing items individually, Peacock may offer bulk removal options or settings to customize your “Continue Watching” preferences. Explore the app’s settings menu or consult Peacock’s support resources for alternative solutions and workarounds.
Tips for Preventing Items from Appearing in “Continue Watching”
To prevent unwanted items from appearing in your “Continue Watching” list in the future, consider marking content as watched, adjusting playback settings, or using separate user profiles for different viewing preferences.
Addressing Common Issues and Concerns
If you encounter any issues or difficulties while removing items from your “Continue Watching” list, reach out to Peacock’s customer support for assistance. They can provide guidance and troubleshooting tips to resolve any issues you may encounter.
Impact of Removing Items on Recommendations and Viewing Experience
Removing items from your “Continue Watching” list may influence Peacock’s recommendations and personalized content suggestions. By curating your viewing history, you can refine the recommendations to better align with your interests and preferences.
Sharing the Peacock Experience with Others
Share your Peacock experience with friends and family by recommending your favorite shows, movies, and exclusive content. Encourage them to explore Peacock’s extensive library of entertainment options and discover new favorites together.
Community Feedback and Support
Join the Peacock community forums and social media groups to connect with fellow users, share tips and tricks, and provide feedback to Peacock’s development team. Your input helps shape the future of the platform and enhances the overall user experience.
Conclusion: Taking Control of Your Peacock Viewing Experience
In conclusion, managing your “Continue Watching” list on Peacock allows you to take control of your viewing experience and tailor it to your preferences. By removing unwanted items, exploring alternative solutions, and providing feedback, you can optimize your Peacock experience and enjoy seamless streaming on your terms.
 Others1 year ago
David T Bolno: Why Giving Back To The Community Is So Crucial
 Travel1 year ago
Practical And Essential Car Interior Accessories To Add Comfort And Convenience To Your Drive
 Travel1 year ago
Business Visa for CANADA
 Fashion1 year ago
Tips For Choosing The Right For Engagement Diamond Rings
 Tech1 year ago
The Best Way to Never Get Lost: Buy Wayfinding Signs!
 Business1 year ago
Top Reasons Why you Need to Consider Outsourcing Real Estate Photo Editing
 Health1 year ago
Garlic Is The Best Vegetable To Treat Heart Problems
 Business1 year ago
Dead And Co Setlist What They Played At The Gorge Amphitheatre