Featured
8 Best White CPU Coolers in 2022
For those of you who are looking for a white CPU cooler, there are a few options you may be interested in. We’ve looked at the Thermalright AXP90 X47, ARCTIC Freezer 34 Esports Duo, and ID-COOLING PINK FLOW 240. Despite the fact that each of these models offers unique and different features, they all offer great performance and easy installation.
Noctua NH-C14S
If you’re in the market for a new white CPU cooler, consider the Noctua NH-C 14S. This model features a C-shaped top-flow design and a 140mm PWM fan. It comes with four rubber strips on the bottom fan mount to help reduce noise.
This slimmer variant of the Noctua NH-U14 shares most features with the larger model. Its slim profile allows it to fit into most motherboards and is compatible with both SLI and Crossfire setups.
The NH-C14S features an off-centre fan mount and includes a Noctua case badge and a low-noise fan adapter. It also has SecuFirm2 mounting hardware and is compatible with AMD AM2/AM3+ mainboards. It weighs 1015g and measures 115mm high, 163mm deep, and 140mm wide. The front aluminum fin is engraved with the Noctua logo.
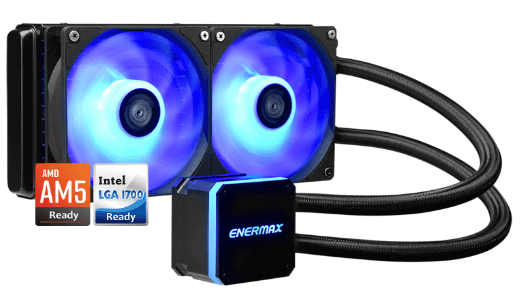
Corsair H100i RGB Platinum SE
The Corsair H100i RGB Platinum SE is an incredibly powerful liquid CPU cooler that helps you manage the thermal performance of your processor while adding a splash of color to your rig. It features a copper cold plate and 128 micro-skived fins per inch for optimal heat dissipation.
This CPU cooler comes with easy to follow installation instructions and is compatible with many CPU sockets. We’ve tested it on an Intel Z370 platform with an Intel Core i7-8086K six-core, twelve-thread processor. We also tested it with an AMD system using an LGA115X bracket.
The Corsair H100i RGB Platinum SE is available with three different fan sizes. The smaller ones are included and offer a more quiet performance. The larger fans are optional but are recommended for a Corsair themed system.
Thermalright AXP90 X47
Thermalright’s AXP90 X47 white CPU cooling solution is a high-quality, top-flow air CPU cooler that stands at 67 mm when fully assembled. The thermalright cooler’s “C-type” aluminium fin-stack draws heat from a C1100 nickel-plated copper base. The TL-D12 PRO-W fan spins at 1,850 RPM and features a fluid-dynamic bearing.
Thermalright has been on a roll lately with its high-end top-flow CPU cooling solutions. The AXP90 X47 Full Copper is made specifically for low-profile builds and features a copper-based heatsink, baseplate, heatpipes, dissipation fins, retention module, and more.
The AMD Ryzen Threadripper 901 CPU cooler features a PPS+ glass fiber housing, an EPDM rubber O-Ring, and a low-resistance radiator. This design improves flow rate, heat exchange efficiency, and cooling performance. It also has a 240-watt TDP and a 5-year warranty.
ID-COOLING SE-224-XT
If you’re looking for an affordable, reliable, and fast CPU cooler for gaming, ID-COOLING SE-224-xT white CPU cooler is an excellent option. Its white LED light and sleek design give it an excellent look and are perfect for all-white PCs.
For cooling, ID-COOLING SE-224-xT white CPU cooler uses Direct Contact method. This method makes direct contact with the CPU using copper heat pipes with an exposed copper surface. This technique enhances contact intensity by 30%. However, this cooler does not employ Continuous Direct Contact because it has gaps between the heat pipes.
Thermalright AXP90 X47
If you’re building a new PC and you’re looking for a CPU cooler, the Thermalright AXP90 X47 is a great choice. This low-profile CPU cooler features a full-copper design and four copper heatpipes to dissipate heat from the CPU. It also has a bright orange fan that moves air around the CPU cooler. And because it’s so low-profile, it’s ideal for a mini-ITX-sized build.
A white CPU cooler can be difficult to find. Most CPU coolers don’t come in white, so you’ll need to look for one that has the features you need and looks good. Thankfully, there are several brands that make white CPU coolers that look great.
Corsair H100i RGB Platinum SE
We were fortunate enough to receive a Corsair H100i RGB Platinum SE processor cooler for review. This CPU cooler features RGB lighting and a large, 240mm design. Its dual Aer P 120mm fans operate at 2000 RPM and produce a low, 21-36 dBA noise level. Additionally, it features a copper cold plate for quiet cooling.
The Corsair H100i RGB Platinum SE is an all-in-one liquid CPU cooler. It features a 240mm radiator with 48 RGB LEDs, two 120mm RGB PWM fans, and optimized cold plate and pump designs. It supports most major CPU sockets. The RGB lighting effects can be customized with the Corsair iCUE software.
DeepCool NEPTWIN
The DeepCool NEPTWIN white has a compact design and is easy to use. It is also quiet and supports multiple fan speed controls. It weighs 1109 grams and provides excellent cooling performance. It is supported by mainstream motherboards. It is available in white and black color options. https://worldpctech.com/cpu-cooler/best-white-cpu-cooler/
The NEPTWIN is a white CPU cooler that’s compatible with a variety of CPU sockets. It features a mirror-polished copper base and six U-shaped heat pipes. It also features two 120mm white LED fans, one of which supports PWM
The article is briefing about “orange box on chromebook”. Chromebooks are renowned for their simplicity and reliability, but occasional issues may arise. One such issue is the appearance of an orange box on the screen, which can be puzzling for users. In this guide, we’ll delve into the causes of the orange box on Chromebook and explore effective solutions to resolve it.
Introduction to Chromebook Orange Box Issue
The orange box issue on Chromebook refers to a notification or visual indicator that appears unexpectedly on the screen, causing confusion and inconvenience for users. Understanding the root cause of this issue is essential for troubleshooting and restoring normal functionality.
Understanding the Orange Box Notification
The orange box notification typically appears in the corner of the screen or within a specific application window on Chromebook. It may indicate various issues, including system updates, network connectivity problems, or software conflicts. Identifying the specific cause of the orange box is the first step towards resolving the issue.
Causes of the Orange Box on Chromebook
Several factors may contribute to the appearance of this box on Chromebook, including:
- Software glitches or bugs
- Outdated system software
- Network connectivity issues
- Corrupted cache or cookies
- Incompatible browser extensions or settings
Resolving The Issue
To resolve the orange box issue on Chromebook, try the following methods:
Method 1: Restarting Your Chromebook
A simple restart can often resolve temporary glitches or software conflicts that may be causing this to appear.
Method 2: Checking for Updates
Ensure that your Chromebook’s operating system and applications are up to date by checking for and installing any available updates.
Method 3: Clearing Cache and Cookies
Clearing your Chromebook’s cache and cookies can help resolve browser-related issues and improve overall performance.
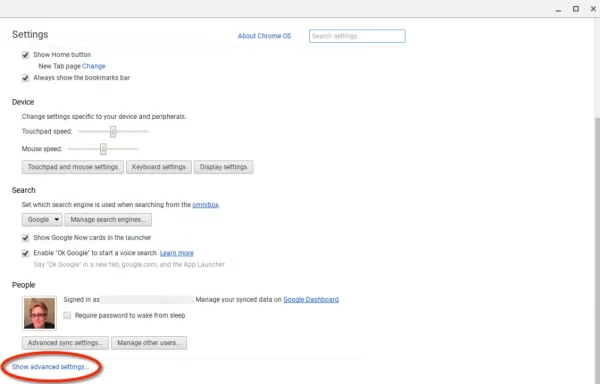
Method 4: Resetting Chrome Settings
Resetting your Chrome browser settings to their default values can help eliminate any misconfigurations or conflicts that may be causing the box to appear.
Method 5: Running the Chromebook Diagnostics
Chromebooks come with built-in diagnostic tools that can help identify and resolve hardware or software issues. Running diagnostic tests may provide insight into the underlying cause of the box problem.
Seeking Professional Help
If this issue persists despite troubleshooting efforts, consider seeking assistance from Chromebook support forums or contacting Google support for further assistance.
Tips to Prevent the Orange Box Issue
- Regularly update your Chromebook’s operating system and applications.
- Avoid installing unnecessary browser extensions or plugins.
- Practice safe browsing habits and avoid visiting suspicious websites.
- Perform routine maintenance tasks, such as clearing cache and cookies, to keep your Chromebook running smoothly.
Conclusion
In conclusion, the orange box issue on Chromebook can be a minor annoyance, but with the right troubleshooting steps, it can be resolved effectively. By understanding the causes of the this and implementing proactive measures to prevent it, users can enjoy a seamless and trouble-free Chromebook experience.
FAQs
What does the orange box on Chromebook signify?
- This box on Chromebook typically signifies a notification or alert. It can indicate various issues such as system updates, network connectivity problems, or software conflicts.
Why is my Chromebook showing an orange box after startup?
- If your Chromebook is showing this after startup, it could be due to several reasons. It may indicate pending system updates, network connection issues, or software conflicts that need attention.
How can I troubleshoot the orange box issue on my Chromebook?
- To troubleshoot the this issue on your Chromebook, you can try the following steps:
- Restart your Chromebook to see if the issue resolves itself.
- Check for and install any pending system updates.
- Ensure that your Chromebook is connected to a stable Wi-Fi network.
- Clear cache and cookies in your Chrome browser.
- Reset Chrome settings to default values.
- Run Chromebook diagnostics to identify any hardware or software issues.
Does the this indicate a hardware or software problem?
- It indicates a software-related issue rather than a hardware problem. It’s often caused by software glitches, outdated system software, network connectivity issues, or browser conflicts.
Is the orange box issue common on all Chromebook models?
- This issue may occur on any Chromebook model, although its frequency and severity may vary. It’s a common software-related issue that can usually be resolved through troubleshooting steps outlined by Chromebook users and support forums.

A question raised a while “how to remove something from continue watching on peacock”. Peacock, NBCUniversal’s streaming service, offers a seamless viewing experience with its “Continue Watching” feature, allowing users to pick up where they left off across different devices. However, managing your “Continue Watching” list becomes essential for a clutter-free and personalized streaming experience. Here’s how you can remove something from “Continue Watching” on Peacock.
Introduction to Peacock’s “Continue Watching” Feature
Peacock’s “Continue Watching” feature remembers your progress in TV shows, movies, and other content, enabling you to resume watching from where you left off. While convenient, the list can quickly become cluttered with unfinished content, prompting the need for management.
Understanding the Importance of Managing “Continue Watching”
Managing your “Continue Watching” list is crucial for maintaining a streamlined viewing experience. By removing unwanted or unfinished items, you can focus on content that truly interests you and discover new favorites without distractions.
Why You Might Want to Remove Items from “Continue Watching”
There are several reasons why you might want to remove items from your “Continue Watching” list on Peacock. These include wanting to declutter your list, removing content you’re no longer interested in, or starting fresh with recommendations based on your current preferences.
How to Remove Items from “Continue Watching” on Peacock
Removing items from your “Continue Watching” list on Peacock is a straightforward process. Follow the steps below to tidy up your viewing history and personalize your streaming experience.
Step-by-Step Guide to Removing Items from “Continue Watching”
Open Peacock App:
- Launch the Peacock app on your preferred device or visit the Peacock website in your browser.
Navigate to “Continue Watching”:
- Locate the “Continue Watching” section on the homepage or in the main menu of the Peacock app.
Select the Content to Remove:
- Scroll through your “Continue Watching” list and select the content you want to remove.
Access Options Menu:
- Look for the three dots or ellipsis icon next to the selected item to access the options menu.
Choose “Remove from Continue Watching”:
- Select the “Remove from Continue Watching” option from the menu.
Confirm Removal:
- Confirm your decision to remove the item from your “Continue Watching” list when prompted.
Repeat if Necessary:
- Repeat the process for any additional items you wish to remove from your list.
Alternative Solutions and Workarounds
In addition to removing items individually, Peacock may offer bulk removal options or settings to customize your “Continue Watching” preferences. Explore the app’s settings menu or consult Peacock’s support resources for alternative solutions and workarounds.
Tips for Preventing Items from Appearing in “Continue Watching”
To prevent unwanted items from appearing in your “Continue Watching” list in the future, consider marking content as watched, adjusting playback settings, or using separate user profiles for different viewing preferences.
Addressing Common Issues and Concerns
If you encounter any issues or difficulties while removing items from your “Continue Watching” list, reach out to Peacock’s customer support for assistance. They can provide guidance and troubleshooting tips to resolve any issues you may encounter.
Impact of Removing Items on Recommendations and Viewing Experience
Removing items from your “Continue Watching” list may influence Peacock’s recommendations and personalized content suggestions. By curating your viewing history, you can refine the recommendations to better align with your interests and preferences.
Sharing the Peacock Experience with Others
Share your Peacock experience with friends and family by recommending your favorite shows, movies, and exclusive content. Encourage them to explore Peacock’s extensive library of entertainment options and discover new favorites together.
Community Feedback and Support
Join the Peacock community forums and social media groups to connect with fellow users, share tips and tricks, and provide feedback to Peacock’s development team. Your input helps shape the future of the platform and enhances the overall user experience.
Conclusion: Taking Control of Your Peacock Viewing Experience
In conclusion, managing your “Continue Watching” list on Peacock allows you to take control of your viewing experience and tailor it to your preferences. By removing unwanted items, exploring alternative solutions, and providing feedback, you can optimize your Peacock experience and enjoy seamless streaming on your terms.
Let’s explore common problems and solutions related to hisense tv volume button. Are you experiencing issues with the volume button on your Hisense TV? Don’t worry; you’re not alone.
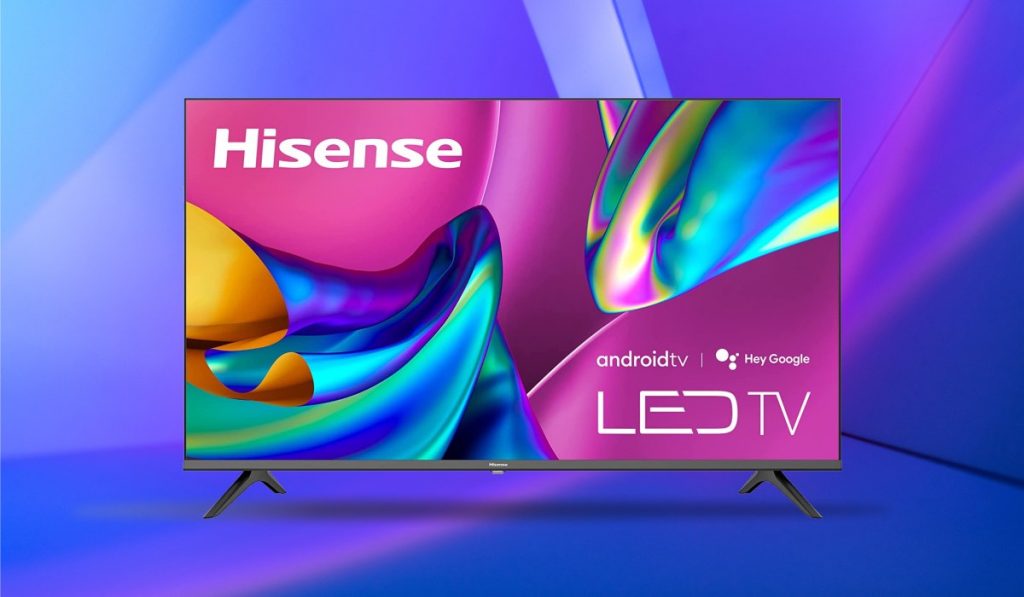
Introduction to Hisense TVs
Hisense is a renowned brand known for its high-quality televisions. It offering innovative features and advanced technology to enhance the viewing experience.
Importance of Volume Buttons on TVs
Volume buttons are essential components of any TV remote control, allowing users to adjust the audio output to their preferred levels. They play a crucial role in ensuring an immersive and enjoyable entertainment experience.
Overview of Hisense TV Volume Button Functionality
Hisense TVs come equipped with volume buttons either on the remote control or on the TV itself. It providing users with convenient access to audio adjustments.
Common Issues with Hisense TV Volume Buttons
Unresponsive Volume Buttons
One of the most common issues encountered with Hisense TV volume buttons is unresponsiveness, where pressing the buttons fails to adjust the volume as intended.
Stuck Volume Buttons
Stuck volume buttons can prevent users from smoothly adjusting the audio levels on their Hisense TVs, causing frustration and inconvenience.
Volume Control Malfunctions
In some cases, Hisense TV volume buttons may malfunction, resulting in erratic volume adjustments or complete loss of functionality.
Troubleshooting Tips for Hisense TV Volume Button Problems
- Check Remote Batteries: Ensure that the batteries in your remote control are functioning correctly and replace them if necessary.
- Clean the Buttons: Dust and debris buildup can interfere with button functionality, so gently clean the volume buttons and the surrounding area.
- Power Cycle the TV: Sometimes, a simple power cycle can resolve minor issues with Hisense TV volume buttons. Turn off the TV, unplug it from the power source, wait for a few minutes, and then plug it back in.
Contacting Hisense Customer Support for Assistance
If troubleshooting steps fail to resolve the volume button issues on your Hisense TV, don’t hesitate to reach out to Hisense customer support for further assistance. They can provide guidance and support to address the problem effectively.
Conclusion
In conclusion, Hisense TV volume button issues can be frustrating but manageable with the right approach. By following the troubleshooting tips and seeking assistance from Hisense customer support when needed, you can restore optimal functionality to your TV.
FAQs
Why are my Hisense TV volume buttons unresponsive?
- Unresponsiveness of the volume buttons on your Hisense TV remote could be due to several reasons, including battery issues, dirt or debris accumulation, or internal malfunction of the remote itself. It’s also possible that the TV’s software may need updating or there could be hardware issues with the TV.
How can I clean the volume buttons on my Hisense TV remote?
- To clean the volume buttons on your Hisense TV remote, you can use a soft, lint-free cloth slightly dampened with water or isopropyl alcohol. Gently wipe the surface of the buttons to remove any dirt, oil, or residue that may be causing them to be unresponsive. Avoid using harsh chemicals or excessive moisture that could damage the remote.
What should I do if my Hisense TV volume buttons are stuck?
- If the volume buttons on your Hisense TV remote are stuck, try gently tapping the remote against your palm to dislodge any debris or particles that may be causing the buttons to stick. You can also carefully pry around the stuck button with a small, thin tool to free it. However, be cautious not to damage the remote further.
Is it possible to control the volume on a Hisense TV without the remote?
- Yes, it’s possible to control the volume on a Hisense TV without the remote. Most Hisense TVs come with physical volume buttons located on the TV itself. Alternatively, if your TV supports HDMI-CEC (Consumer Electronics Control), you may be able to control the volume using a compatible HDMI-CEC enabled device or universal remote.
How long does Hisense customer support take to respond to inquiries about volume button issues?
- The response time from Hisense customer support regarding volume button issues may vary depending on factors such as the volume of inquiries, the complexity of the issue, and the efficiency of the customer support team. Generally, it’s recommended to contact Hisense customer support directly for an estimated response time based on their current workload and service standards.
 Others10 months ago
David T Bolno: Why Giving Back To The Community Is So Crucial
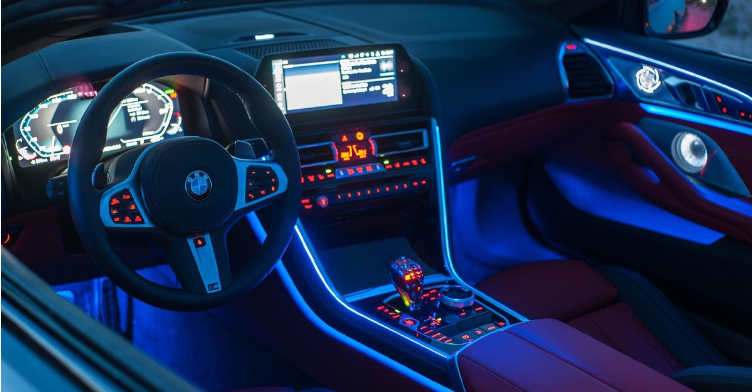 Travel10 months ago
Practical And Essential Car Interior Accessories To Add Comfort And Convenience To Your Drive
 Travel10 months ago
Business Visa for CANADA
 Business10 months ago
Top Reasons Why you Need to Consider Outsourcing Real Estate Photo Editing
 Health10 months ago
Garlic Is The Best Vegetable To Treat Heart Problems
 Fashion10 months ago
Tips For Choosing The Right For Engagement Diamond Rings
 Business10 months ago
Dead And Co Setlist What They Played At The Gorge Amphitheatre
 Tech10 months ago
The Best Way to Never Get Lost: Buy Wayfinding Signs!