Software
Mastering CapCut Overlay: Elevate Your Video Editing Game
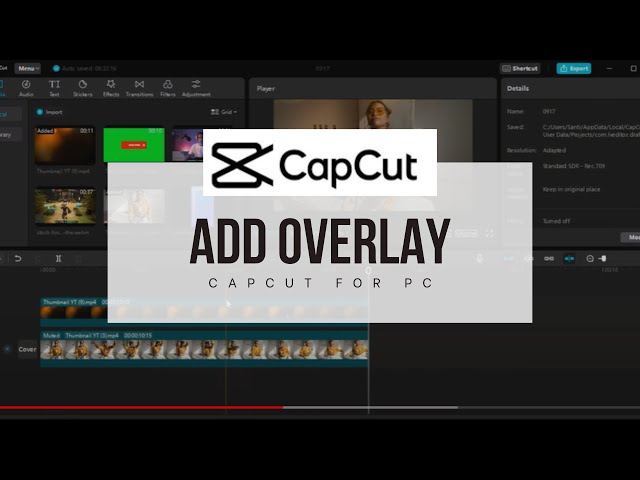
The capcut overlay.Capcut is a popular video editing app developed by ByteDance, offers a wide range of features to enhance and customize your videos. One such feature is Overlay, which allows users to add text, images, or videos on top of their existing footage, creating engaging visual effects.
Understanding CapCut
CapCut, formerly known as Viamaker, is a user-friendly video editing app available for both iOS and Android devices. With its intuitive interface and powerful editing tools, CapCut has gained popularity among content creators, vloggers, and social media enthusiasts.
What is Overlay in CapCut?
Definition
In CapCut, Overlay refers to the process of adding additional elements, such as text, images, or videos, onto your main video footage. These overlays can enhance your videos by providing context, emphasis, or visual appeal.
Functionality
The Overlay feature in CapCut allows users to layer multiple elements on top of each other, creating dynamic and visually appealing compositions. Whether you want to add subtitles, logos, or decorative elements, CapCut’s Overlay feature offers flexibility and customization options.
How to Use Overlay in CapCut
Accessing Overlay Feature
To access the Overlay feature in CapCut, open the app and import your video footage into the timeline. Then, tap on the “Overlay” option from the toolbar to enter the Overlay editing interface.
Adding Overlays
Once you’re in the Overlay editing interface, tap on the “Add” button to choose the type of overlay you want to add, such as text, image, or video. Select the desired element from your device’s library or use CapCut’s built-in assets.
Adjusting Overlay Settings
After adding an overlay, you can adjust its size, position, duration, and opacity to achieve the desired effect. Use the on-screen controls or sliders to customize the overlay according to your preferences.
Types of Overlays in CapCut
CapCut offers various types of overlays to suit different creative needs and preferences:
Text Overlays
Text overlays allow users to add titles, captions, or annotations to their videos. Users can choose from a variety of fonts, styles, and colors to customize the text overlay according to their branding or aesthetic preferences.
Image Overlays
Image overlays enable users to overlay graphics, logos, or decorative elements onto their videos. Users can resize, rotate, and adjust the opacity of the image overlay to integrate it seamlessly with the main video footage.
Video Overlays
Video overlays allow users to insert additional video clips or animations onto their main video footage. Users can trim, resize, and position the video overlay to create dynamic visual effects or transitions.
Customizing Overlays
Changing Size and Position
In CapCut, users can easily resize and reposition overlays by dragging them on the screen or using the on-screen controls. This flexibility allows users to achieve precise placement and alignment of overlays within their videos.
Applying Effects and Filters
CapCut offers a variety of effects and filters that users can apply to their overlays to enhance their visual appeal. From color correction to stylized effects, users can experiment with different options to achieve the desired look and feel.
Tips for Using CapCut Overlay Effectively
Keep it Simple
Avoid overcrowding your videos with too many overlays. Instead, focus on using overlays strategically to enhance key moments or convey important information.
Experiment with Blending Modes
CapCut offers various blending modes that allow users to blend overlays seamlessly with the underlying video footage. Experiment with different blending modes to achieve creative and eye-catching effects.
Maintain Consistency
When using text overlays, maintain consistency in font styles, colors, and formatting throughout your video to create a cohesive visual identity.
Conclusion
CapCut’s Overlay feature offers a versatile and creative way to enhance your videos with text, images, and videos. By understanding how to effectively use overlays and experimenting with different customization options, you can elevate your video content and captivate your audience.
FAQs
Can I customize the appearance of text overlays in CapCut?
- Yes, CapCut offers a variety of customization options for text overlays, including font styles, colors, sizes, and animations.
Can I add multiple overlays to my video in CapCut?
- Yes, CapCut allows users to add multiple overlays, including text, images, and videos, to their videos and adjust their placement and appearance as needed.
Does CapCut offer pre-made overlay templates?
- Yes, CapCut provides a selection of pre-made overlay templates that users can use to quickly add stylish effects to their videos.
Can I animate overlays in CapCut?
- Yes, CapCut offers animation features that allow users to animate overlays, including text, images, and videos, to create dynamic visual effects.
Is CapCut available for both iOS and Android devices?
- Yes, CapCut is available for both iOS and Android devices and can be downloaded for free from the App Store and Google Play Store.


In today’s digital age, a restaurant app is more than just a tool for reservations; it’s a powerful platform for connecting with customers and driving revenue. However, as restaurateurs dive into the world of restaurant app development services, understanding effective monetization strategies becomes crucial. The right approach can enhance user experience while boosting the bottom line.
Monetizing your restaurant app involves a blend of creativity and strategic planning. From in-app purchases and subscription models to advertising and loyalty programs, there are numerous avenues to explore. For instance, offering premium features — such as exclusive menu items or early access to special events — can entice users to make additional purchases.
Moreover, integrating a loyalty program can foster customer retention, encouraging repeat visits and increasing overall spending. Collaborating with local businesses for cross-promotions within the app can also generate additional revenue streams, while simultaneously enhancing the customer experience.
Ultimately, the key lies in striking a balance between generating income and providing value. By prioritizing user engagement and satisfaction, restaurant owners can enjoy sustained profitability while keeping their customers coming back for more.
Understanding Your Target Audience
To effectively monetize your restaurant app, it’s crucial to first understand your target audience. Begin by identifying who your primary users are — whether they are busy professionals looking for quick meal options, families wanting to order in for convenience, or foodies eager to explore new culinary experiences. Each segment has distinct preferences and spending habits that can influence how they engage with your app.
Utilize analytics tools to gather insights into user behavior. Look for patterns in how often they order, their preferred dishes, and peak usage times. This data can help tailor promotions and features that resonate with your audience. For instance, if you find that families frequently order during weekends, consider launching family meal deals or loyalty programs that reward repeat orders.
Additionally, engage with your audience through surveys or feedback forms. Understanding their pain points — like delivery times or menu variety — can lead to improvements that enhance user satisfaction and boost revenue. By aligning your monetization strategies — be it through in-app purchases, subscription models, or advertising — with the preferences and needs of your target audience, you can create a more personalized experience that drives loyalty and increases your bottom line.
Freemium Model: Offering Value Before Charging

In the competitive landscape of restaurant apps, leveraging the freemium model can be a game-changer. This strategy allows users to access a base level of service for free while enticing them to upgrade for premium features. The key is to offer genuine value from the outset, ensuring that users find the app indispensable.
Start by providing essential functionalities like menu browsing, reservation capabilities, and location-based services without charge. This not only attracts a larger audience but also builds familiarity and trust with your brand. To encourage upgrades, consider introducing premium features such as exclusive discounts, loyalty rewards, or personalized dining experiences.
A well-timed push notification about a limited-time offer or a sneak peek of a new menu item can create urgency, prompting users to explore these premium offerings. Additionally, incorporating user feedback into your premium features can enhance satisfaction and encourage word-of-mouth referrals.
Remember, the freemium model thrives on a delicate balance — ensure that the free version remains robust enough to engage users while strategically highlighting the benefits of the paid upgrade. This approach not only fosters a loyal customer base but also creates a steady revenue stream as users recognize the added value in your premium services.
Subscription Services: Creating Recurring Revenue
In the competitive landscape of the restaurant industry, subscription services present a lucrative opportunity to create a steady stream of recurring revenue. By offering a subscription model, restaurants can enhance customer loyalty while providing patrons with exclusive benefits that elevate their dining experience.
Start by defining clear tiers for your subscription plans. For example, a basic tier could offer discounts on meals or drinks, while premium tiers might include perks such as priority reservations, access to special events, or exclusive menu items. This tiered approach not only attracts a broader customer base but also encourages upselling, as diners may be tempted to upgrade for enhanced benefits.
Additionally, integrating a loyalty program within your subscription service can amplify its appeal. Reward points earned through subscriptions can be redeemed for meals or merchandise, creating a tangible incentive for customers to remain engaged.
Leverage technology by utilizing your app to facilitate easy sign-ups, renewals, and reminders for subscribers. Regularly updating subscribers with personalized offers based on their dining history can also foster a deeper connection, making them more likely to stay subscribed. Ultimately, a well-executed subscription model can transform casual diners into loyal patrons, ensuring consistent revenue for your restaurant.
In-App Advertising: Balancing User Experience and Revenue

In-app advertising can be a lucrative revenue stream for restaurant apps, but striking a balance between monetization and user experience is crucial. Users are more likely to abandon an app that bombards them with intrusive ads, so it’s essential to integrate advertising seamlessly.
Start by choosing ad formats that align with your app’s design and user journey. Native ads, which blend into the app’s content, tend to perform better than traditional banner ads. By promoting local businesses or featured menu items, you can create a win-win scenario that enhances user experience while generating revenue.
Timing is everything. Consider placing ads during natural pauses in the user experience, such as after a completed order or during a wait time for meal preparation. This approach minimizes disruption and keeps users engaged.
Additionally, offer incentives for users to interact with ads, such as discounts or loyalty points. This not only encourages engagement but also enhances the user’s perception of value, making them more likely to return.
By thoughtfully incorporating in-app advertising, you can leverage this revenue source without alienating your customers, ensuring both profitability and a positive user experience.
Partnerships and Collaborations: Expanding Your Reach
One of the most effective ways to expand your restaurant app’s reach is through strategic partnerships and collaborations. By aligning with local businesses, food delivery services, and even influencers, you can tap into new customer bases and enhance your app’s value proposition.
Consider collaborating with nearby businesses for cross-promotions. For instance, partner with a local bakery to offer exclusive discounts on dessert items when customers order through your app. This not only drives traffic to your restaurant but also fosters community ties, making your brand more relatable.
Incorporating third-party delivery services can also elevate your reach. By integrating with platforms like Uber Eats or DoorDash, you can access their established customer networks while providing convenience for your users. Offering app-exclusive delivery promotions can further incentivize orders.
Don’t underestimate the power of social media influencers; partnering with food bloggers or local celebrities can amplify your visibility. They can showcase your app and its features to their followers, creating buzz and attracting new customers.
Ultimately, thoughtful partnerships can create a win-win scenario, enhancing customer experience while driving revenue growth for your restaurant app.
Effective Promotions and Discounts Strategies
- Loyalty Programs: Reward customers for frequent visits by offering points for every purchase that can be redeemed for discounts or freebies. This builds a sense of belonging and keeps them coming back.
- Limited-Time Offers: Create urgency by introducing flash sales or limited-time discounts on specific items. This can boost traffic during slower periods and create excitement around your menu.
- Referral Discounts: Encourage existing customers to refer friends by offering both parties a discount on their next order. This not only expands your customer base but also fosters community.
- Seasonal Promotions: Align your discounts with holidays or local events. For example, offer special deals for Valentine’s Day or during a local festival, tapping into the festive spirit of your customers.
- Bundle Deals: Create attractive meal bundles at a discounted rate. This not only increases the average order value but also simplifies decision-making for customers.
Leveraging Data Analytics for Revenue Optimization
In today’s competitive restaurant landscape, leveraging data analytics can significantly enhance your app’s revenue potential. By harnessing customer insights, restaurants can tailor offerings to meet specific preferences, increasing both engagement and sales. For instance, analyzing purchase histories allows you to identify popular dishes and peak ordering times, enabling targeted promotions that maximize profits.
Utilizing A/B testing within the app can further refine marketing strategies. Experimenting with different pricing models, promotional offers, or loyalty programs helps pinpoint what resonates most with your audience. Additionally, implementing predictive analytics can forecast trends, providing valuable foresight into inventory management and staffing needs — essential for minimizing costs.
Integrating customer feedback mechanisms within your app can yield real-time insights that inform menu adjustments and service enhancements. This not only improves the customer experience but also fosters loyalty, encouraging repeat business.
Furthermore, segmenting your audience based on behavior allows for personalized marketing campaigns. Tailored notifications about exclusive deals or events can drive traffic during slower periods, optimizing revenue streams. By making data-driven decisions, you can ensure your restaurant app not only attracts users but also converts them into loyal patrons, ultimately boosting your bottom line.
Enhancing User Engagement to Drive Sales
To effectively monetize your restaurant app, enhancing user engagement is paramount. Start by personalizing the user experience — leveraging data analytics to tailor recommendations based on previous orders, dietary preferences, or even special occasions like birthdays. This approach not only fosters loyalty but also encourages repeat visits, increasing the likelihood of upselling.
Integrate gamification features, such as reward points for frequent orders or interactive challenges that unlock exclusive discounts. Not only does this create a fun, engaging atmosphere, but it also incentivizes users to return frequently, driving up overall sales.
Push notifications can be a powerful tool when used judiciously. Send timely alerts about limited-time offers, new menu items, or special events to encourage immediate action. However, balance is key; overusing notifications can lead to app fatigue, resulting in users opting out.
Social sharing features can further amplify engagement. Encourage users to share their dining experience on social platforms directly through the app, offering discounts or freebies in return. This not only increases visibility but also taps into the power of word-of-mouth marketing, drawing in a wider audience and ultimately leading to increased sales.
Conclusion: Future Trends in Restaurant App Monetization
As the digital landscape continues to evolve, restaurant app monetization strategies are becoming increasingly innovative. One prominent trend is the integration of artificial intelligence and machine learning, which allows for hyper-personalized dining experiences. By analyzing user preferences and behavior, restaurants can offer tailored promotions and menu recommendations, fostering customer loyalty and driving incremental revenue.
Additionally, subscription models are gaining traction, with restaurants offering exclusive deals or loyalty perks for a monthly fee. This approach not only ensures a steady income stream but also deepens customer engagement.
Another exciting development is the rise of social dining experiences through app features that enable users to share their dining experiences, post reviews, or even invite friends to join them. This social aspect not only enhances user engagement but also serves as a powerful marketing tool, effectively driving new customer acquisition.
Finally, as sustainability becomes a key consumer concern, apps that promote eco-friendly practices — such as sourcing locally or reducing food waste — can attract environmentally conscious diners. By leveraging these trends, restaurant apps can enhance their value proposition, ensuring they remain relevant in a competitive market while maximizing profitability.
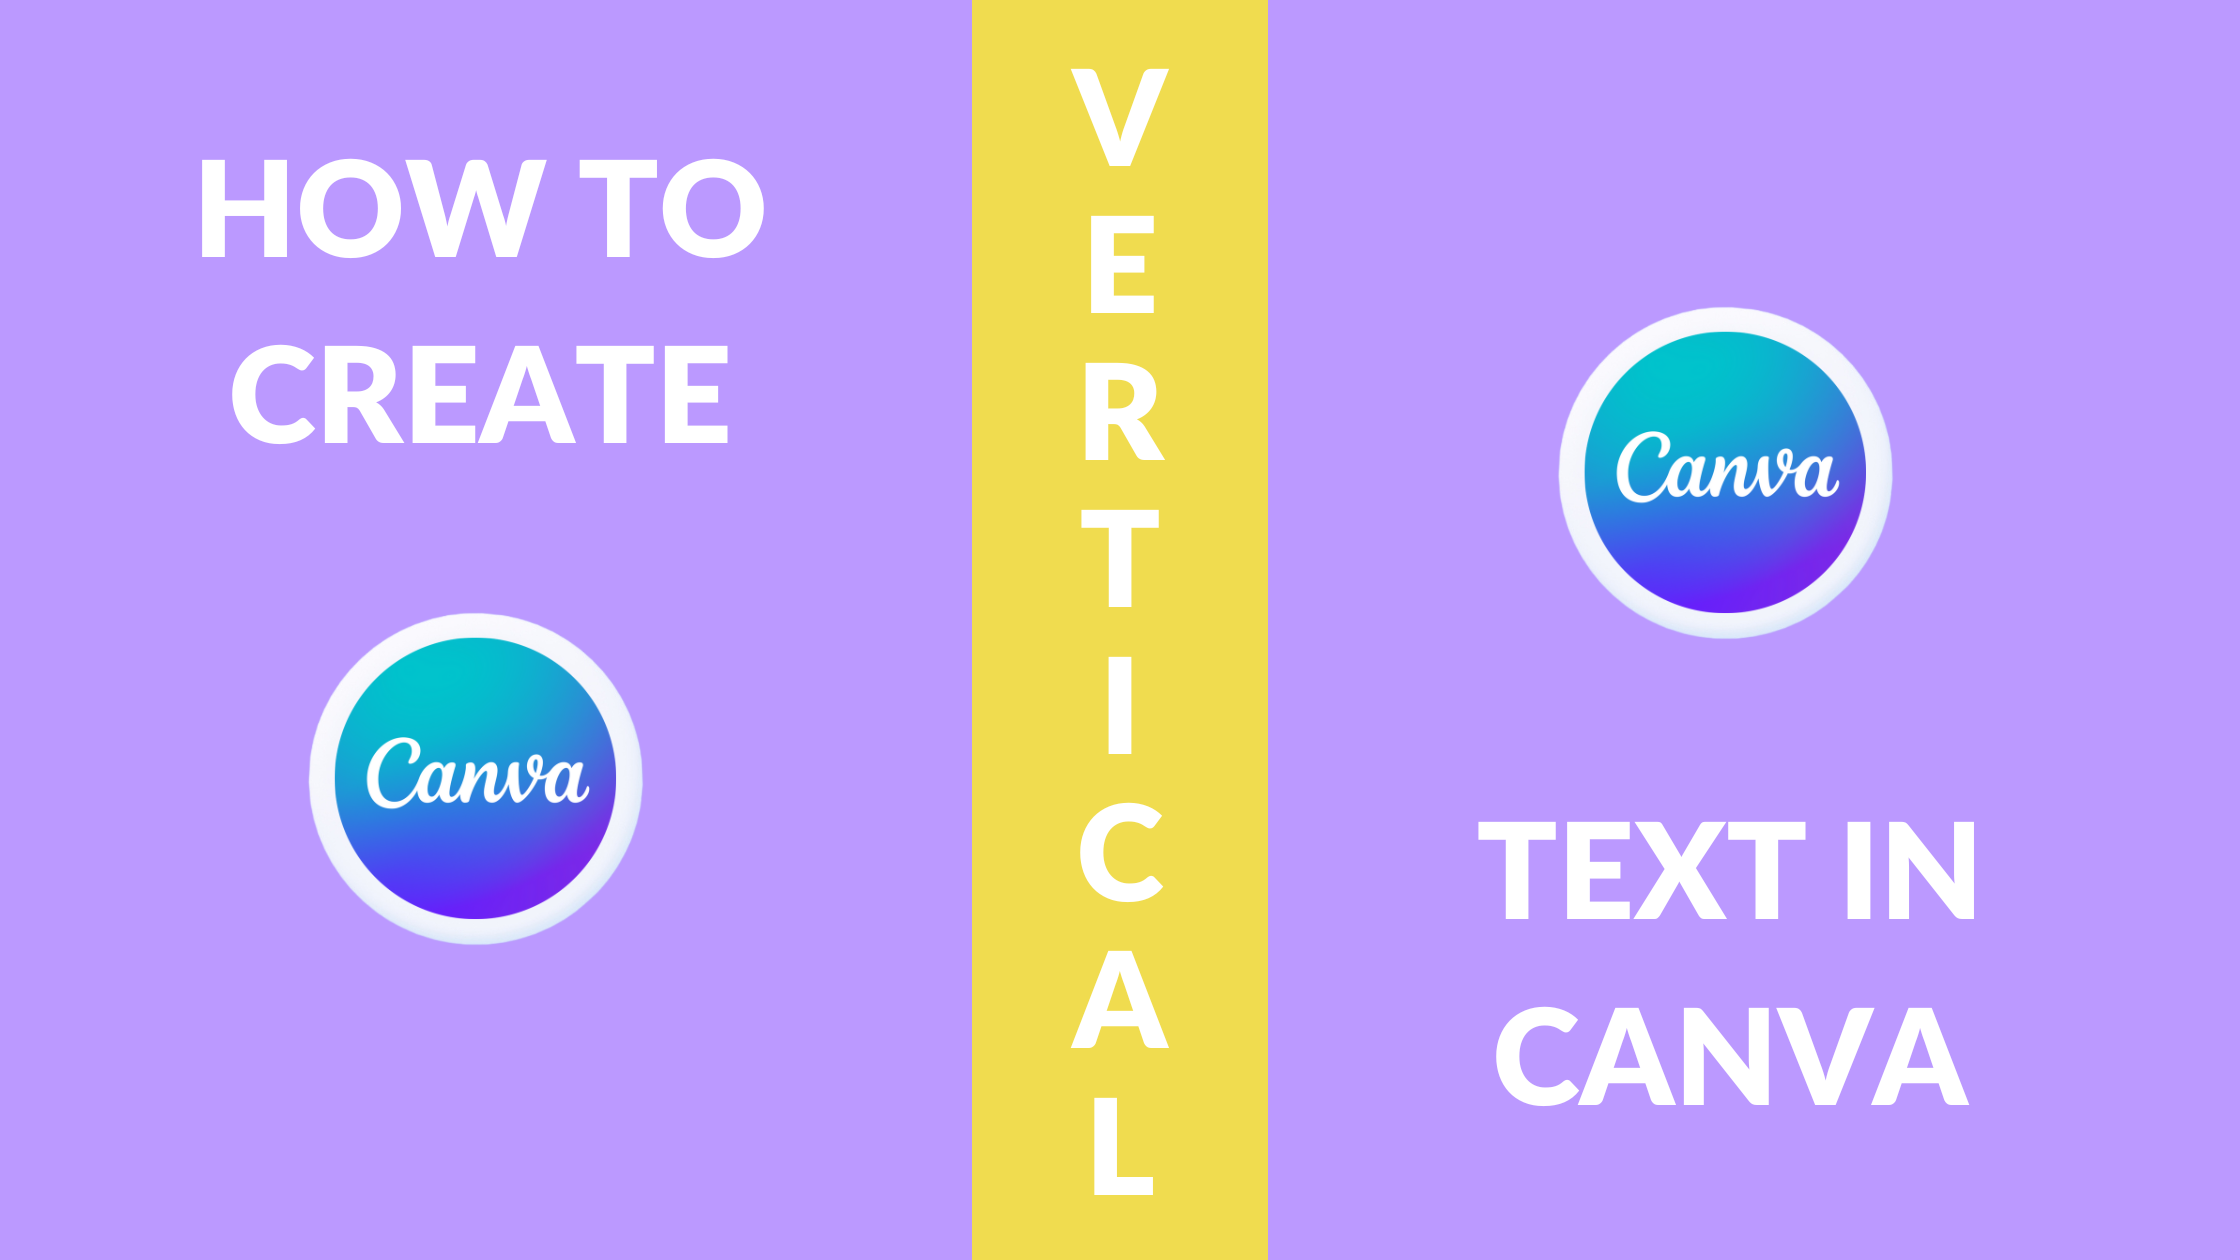
In the world of graphic design, creativity knows no bounds. Vertical text, a stylish and trendy element, has become increasingly popular in various digital designs. Canva, a user-friendly design platform, offers a plethora of tools and features to incorporate vertical text seamlessly into your creations.
Importance of Using Vertical Text
Vertical text adds visual interest and dynamism to designs, breaking away from traditional horizontal layouts. It grabs attention and creates a unique aesthetic appeal, making your content stand out in crowded digital spaces.
How to Create Vertical Text in Canva
Accessing Canva
- Begin by accessing Canva through your web browser or mobile app.
Choosing Vertical Text Template
- Navigate to the template library and select a design template suitable for vertical text.
Customizing Vertical Text
- Click on the text element and rotate it vertically using the rotation handle. Customize font styles, sizes, colors, and alignment to suit your design preferences.
Tips for Designing Vertical Text in Canva
Font Selection
- Choose fonts that are legible and complement the overall theme of your design. Experiment with different font styles to find the perfect match.
Color Contrast
- Ensure adequate contrast between text and background to enhance readability and visual impact.
Text Alignment
- Align vertical text strategically within the design composition to maintain balance and harmony.
Benefits of Vertical Text in Designs
Vertical text offers versatility and flexibility in design layouts, allowing designers to explore innovative typography solutions. It provides a fresh perspective and adds depth to visual storytelling across various digital platforms.
Examples of Effective Use of Vertical Text
- Social media graphics
- Event posters
- Infographics
- Book covers
Conclusion
In conclusion, vertical text in Canva serves as a powerful tool for elevating your design projects and capturing audience attention. By mastering the art of vertical typography, you can unleash your creativity and create visually stunning compositions that leave a lasting impression.
FAQs
- Can I use vertical text in Canva’s free version?
- Yes, you can create and use vertical text in Canva’s free version. Canva offers a wide range of design elements and features, including vertical text, for free users to explore and utilize in their projects.
- Is vertical text suitable for all types of designs?
- While vertical text adds a unique and stylish touch to many designs, its suitability depends on the context and purpose of the design. Vertical text works well for social media graphics, posters, and certain types of branding materials, but may not be ideal for all design scenarios.
- How can I ensure vertical text remains legible on different devices?
- To ensure that vertical text remains legible across different devices, consider factors such as font size, font style, and color contrast. Use legible fonts, appropriate font sizes, and ensure sufficient contrast between the text and background to enhance readability.
- Are there any limitations to rotating text vertically in Canva?
- Canva provides users with the flexibility to rotate text vertically as part of their design customization options. However, users may encounter limitations in terms of text formatting and alignment when working with vertical text in Canva, especially in more complex design compositions.
- Can I animate vertical text in Canva designs?
- As of the current features available in Canva, there is no native support for animating text, including vertical text, within Canva designs. However, Canva continually updates its features and functionality, so it’s always worth checking for any new updates or additions related to animation features.

The article “how to get rid of orange box on chromebook” Chromebooks offer a convenient and efficient way to browse the web and perform various tasks. However, encountering unexpected issues like the appearance of an orange box can be frustrating for users. In this guide, we’ll explore the causes of the orange box on Chromebook and provide effective solutions to remove it.
Introduction to the Orange Box on Chromebook
The orange box that appears on a Chromebook screen can disrupt the user experience and raise concerns about the device’s functionality. Understanding the root cause of this issue is the first step toward resolving it and restoring normal operation.
Understanding the Orange Box
The orange box typically appears as an overlay on the screen, obstructing content and causing inconvenience to users. It may manifest as a notification, error message, or graphical anomaly, signaling an underlying problem that requires attention.
Common Causes of the Orange Box
Chromebook Updates
Outdated software or pending updates may trigger the appearance of the orange box on Chromebook screens. Keeping the device and browser up to date is essential for optimal performance and stability.
Extensions or Add-ons
Incompatible or malfunctioning browser extensions or add-ons can contribute to the emergence of the orange box. These additional features may conflict with Chromebook settings, resulting in unexpected behavior and visual anomalies.
System Errors
Internal errors within the Chromebook operating system or browser environment can manifest as the orange box phenomenon. Identifying and addressing these errors is crucial for restoring normal functionality and resolving the issue.
Methods to Get Rid of the Orange Box
Check for Chromebook Updates
Ensure that your Chromebook is running the latest version of the operating system and browser software. To check for updates, navigate to the Settings menu, select “About Chrome OS,” and click on “Check for updates.”
Disable Extensions or Add-ons
Temporarily disable all browser extensions and add-ons to determine if any of them are causing the orange box problem. Access the Extensions menu from the Chrome browser settings and disable each extension individually or in bulk.
Clear Cache and Cookies
Clearing the cache and cookies stored in the Chrome browser can help eliminate temporary data that may be contributing to the orange box issue. Go to the Chrome settings, select “Privacy and security,” and click on “Clear browsing data” to perform this action.
Reset Chromebook Settings
If the above methods fail to resolve the issue, consider resetting your Chromebook settings to their default configurations. This step will revert all settings to their original state, potentially resolving any underlying issues causing the orange box problem.
Troubleshooting Additional Issues
If the orange box persists despite troubleshooting efforts, consider seeking assistance from Chromebook support forums or contacting technical support for further guidance. Professional assistance may be necessary to address complex or persistent issues.
Conclusion
In conclusion, encountering the orange box on a Chromebook can be perplexing, but it is not insurmountable. By understanding the common causes and implementing the troubleshooting methods outlined in this guide, users can effectively remove the orange box and restore their Chromebook’s functionality.
FAQs About Removing the Orange Box on Chromebook
Why does the orange box appear on my Chromebook?
- The orange box may appear due to various reasons, including outdated software, incompatible extensions, or system errors.
Can I remove the orange box by restarting my Chromebook?
- Restarting your Chromebook may temporarily alleviate the issue, but it’s essential to address the underlying cause to prevent recurrence.
Will resetting my Chromebook delete all my data?
- Resetting your Chromebook settings will restore them to their default state but should not affect your personal data stored in the cloud.
How can I prevent the orange box from appearing in the future?
- Keeping your Chromebook and browser software up to date, using compatible extensions, and practicing good browsing habits can help prevent the recurrence of the orange box issue.
What should I do if none of the troubleshooting methods work?
- If the orange box persists despite troubleshooting efforts, consider seeking assistance from Chromebook support forums or contacting technical support for further assistance.
 Others1 year ago
David T Bolno: Why Giving Back To The Community Is So Crucial
 Travel1 year ago
Practical And Essential Car Interior Accessories To Add Comfort And Convenience To Your Drive
 Travel1 year ago
Business Visa for CANADA
 Fashion1 year ago
Tips For Choosing The Right For Engagement Diamond Rings
 Tech1 year ago
The Best Way to Never Get Lost: Buy Wayfinding Signs!
 Business1 year ago
Top Reasons Why you Need to Consider Outsourcing Real Estate Photo Editing
 Health1 year ago
Garlic Is The Best Vegetable To Treat Heart Problems
 Business1 year ago
Dead And Co Setlist What They Played At The Gorge Amphitheatre